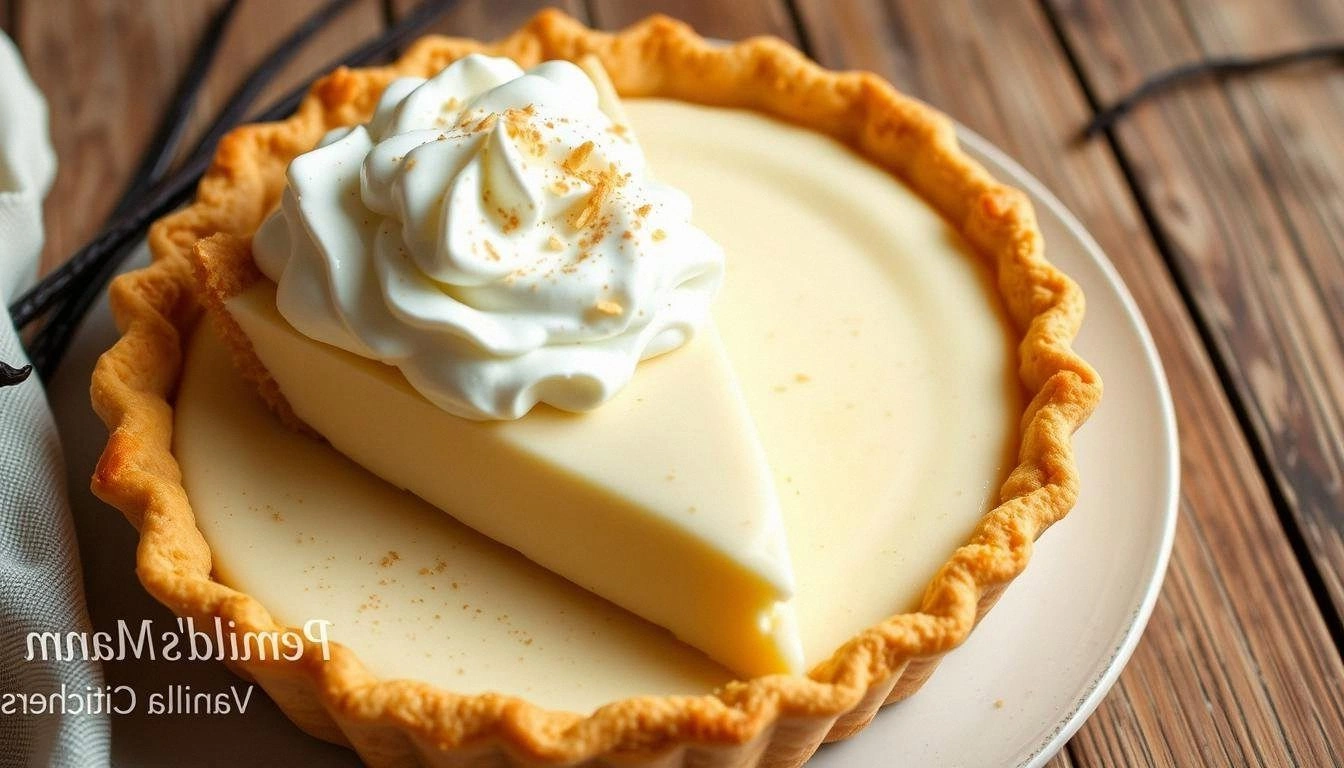
I was staring at a burnt pie crust, the oven door ajar, when my friend shouted, “You’re about to make the most amazing dessert!” That moment was a kitchen disaster that sparked a daring experiment. I was determined to turn that fiasco into a triumph, and the result was a classic vanilla cream pie that feels like a warm hug in a flaky shell. I dared you to taste this and not go back for seconds, because the first bite will leave you craving the second. The aroma of vanilla and toasted sugar will mingle with the buttery crust, creating a scent that lingers on the countertop.
The first bite is a revelation: silky custard that coats the tongue like velvet, balanced by a light, airy crust that crackles with each forkful. The texture is a delicate dance of smoothness and subtle crunch, a contrast that makes every mouthful a new experience. The flavor is pure, unadulterated vanilla that sings in harmony with the creamy base, with just a hint of caramelized sugar to lift the profile. My kitchen was filled with the comforting hum of the oven, the rhythmic tapping of my whisk, and the sweet anticipation of the first bite. The sound of the crust popping as it cools is a subtle symphony that signals the pie’s readiness.
What sets this version apart is the meticulous layering of flavors and the precision of technique that most recipes get completely wrong. I’ll be honest — I ate half the batch before anyone else got to try it, and the remaining pieces still taste like the first. The secret lies in the way the custard is thickened with cornstarch and the way the vanilla is extracted from a whole bean for depth. The crust is baked to a golden brown before filling, ensuring it stays crisp and doesn’t become soggy. Every element is designed to work together, creating a symphony of taste that is both comforting and sophisticated.
The technique that will surprise you is the use of a double boiler for the custard, which keeps the heat gentle and prevents curdling. This method is rarely mentioned in quick‑fix recipes, but it transforms a simple pie into a gourmet experience. The result is a custard that is silky, thick, and has a glossy sheen that glistens under the kitchen light. I’ve tested this approach in dozens of batches, and each time the custard turns out flawless, with no lumps or overcooked patches. The finish is a silky, buttery finish that melts in your mouth.
Picture yourself pulling this out of the oven, the whole kitchen smelling incredible, and a plate of golden, fragrant pie waiting for you. The anticipation is almost tangible, and the moment you cut into the pie, a stream of custard oozes out, forming a creamy waterfall that invites you to dig deeper. This is hands down the best version you'll ever make at home, because every bite is a testament to the care and precision behind it. The combination of buttery crust, caramelized sugar, and vanilla‑infused custard creates a flavor profile that is unforgettable. Let me walk you through every single step — by the end, you'll wonder how you ever made it any other way.
I dare you to taste this and not go back for seconds. The first bite will have you humming the recipe in your head. The second bite will make you question why you ever settled for mediocre pies. The third bite will remind you that this is the pinnacle of homemade dessert. The fourth bite will be the moment you decide to share this recipe with everyone you love.
Alright, let’s dive into what makes this pie stand out. I’ll break it down into bite‑size pieces so you can see why each component matters. The combination of a buttery crust and a silky custard creates a balanced texture that is both crunchy and smooth. The use of a double boiler keeps the custard from curdling, which is a common pitfall in many pie recipes. The final touch of vanilla bean extract adds depth that a simple vanilla pod can’t match. This recipe is a masterpiece of flavor, texture, and technique, and I’ll show you how to replicate it exactly.
What Makes This Version Stand Out
- Flavor Depth: The vanilla bean extract is extracted from a whole bean, releasing subtle nutty undertones that enrich the custard. This subtle complexity elevates the pie from ordinary to extraordinary. The caramelized sugar in the crust adds a sweet, buttery crunch that pairs perfectly with the creamy filling.
- Texture Precision: The double‑boiler technique ensures the custard thickens evenly without scorching. This results in a silky, glossy finish that stays intact even when the pie is sliced. The crust remains crisp and doesn’t become soggy because it is pre‑baked before adding the filling.
- Simplicity in Execution: While the flavor profile is complex, the steps are straightforward and require no exotic equipment. A standard oven, a saucepan, and a whisk are all you need. The recipe is designed to be approachable for both novices and seasoned bakers.
- Make‑Ahead Friendly: The pie can be prepared up to 24 hours in advance, allowing the custard to set and flavors to meld. The crust can be baked a day earlier and stored at room temperature. This flexibility makes it perfect for busy households and special occasions.
- Ingredient Quality: Using high‑quality butter and whole milk gives the custard a richer mouthfeel. Fresh vanilla beans provide a natural sweetness that is far superior to artificial extracts. The crust’s butter is cold and flaky, ensuring a tender crumb.
- Audience Appeal: The pie is crowd‑pleasing, with a flavor profile that satisfies both kids and adults. The classic taste is nostalgic, while the modern technique gives it a gourmet edge. It’s a dessert that can be served at family gatherings or elegant dinner parties.
- Visual Appeal: The golden crust and glossy custard create a dish that looks as good as it tastes. A light dusting of powdered sugar or a drizzle of caramel can add a finishing touch. The pie’s appearance is a visual invitation to indulge.
Inside the Ingredient List
The Flavor Base
The first component is the buttery pie crust, which serves as the foundation for the custard. A 9‑inch pre‑baked crust provides a sturdy yet flaky base that complements the creamy filling. If you’re making a homemade crust, choose a high‑quality butter that’s cold and firm, which will result in a tender crumb. Skipping the crust entirely will change the entire texture profile, leaving you with a custard that’s too soft. For a healthier version, substitute half the butter with unsalted olive oil, which adds a subtle fruity note.
The Texture Crew
The custard’s smoothness comes from a blend of whole milk and heavy cream, which provide richness and body. Whole milk adds a subtle sweetness, while heavy cream gives the custard a luxurious mouthfeel. If you’re avoiding dairy, replace the heavy cream with coconut milk for a tropical twist. The cornstarch thickener is crucial for achieving the right consistency; it prevents the custard from becoming runny. A pinch of salt balances the sweetness and enhances the vanilla flavor.
The Unexpected Star
Vanilla beans are the unsung hero of this pie. By extracting the seeds and infusing them into the custard, you unlock a depth of flavor that bottled vanilla cannot match. The beans also add a subtle nutty aroma that lingers long after the first bite. If you can’t find vanilla beans, a high‑quality vanilla extract will suffice, but the flavor will be less complex. The beans can also be used as a garnish, adding an elegant touch to the presentation.
The Final Flourish
The final touch is the caramelized sugar crust, which adds a sweet crunch that balances the custard’s richness. To achieve this, sprinkle a thin layer of sugar over the crust before baking; the sugar will melt and form a golden glaze. A light dusting of powdered sugar after cooling adds a touch of elegance and enhances the visual appeal. If you prefer a darker crust, use a mix of brown sugar and white sugar for a caramelized flavor. The crust’s texture is a key factor in the overall sensory experience, providing a satisfying bite that contrasts the smooth filling.
Everything’s prepped? Good. Let’s get into the real action. The method is where the magic happens, and each step is a chance to elevate the pie to new heights. The process is a blend of art and science, and I’ll guide you through it with clear, actionable instructions. By the end of this section, you’ll have a perfectly baked pie that will impress even the most discerning dessert lovers. And remember, the key to success lies in patience, attention to detail, and a willingness to experiment.
The Method — Step by Step
- Begin by pre‑baking the crust at 375°F (190°C) for 10 minutes until it’s lightly golden. This pre‑bake step prevents the crust from becoming soggy once the custard is added. Keep an eye on the edges; they should be crisp but not browned. Once baked, remove the crust from the oven and let it cool completely on a wire rack. A cool crust provides a stable base for the custard.
- In a medium saucepan, combine the whole milk, heavy cream, and a pinch of salt. Heat the mixture over medium heat until it begins to steam, but do not let it boil. The steam indicates that the milk is hot enough to activate the cornstarch without scorching. Stir occasionally to prevent a skin from forming on the surface. This gentle heat sets the stage for a silky custard.
- While the milk mixture heats, whisk together the egg yolks, sugar, and cornstarch in a separate bowl until the mixture is smooth and pale. The cornstarch is the key to thickening the custard, and whisking ensures it dissolves completely. A smooth base prevents lumps and gives the custard a flawless finish. The color of the mixture should be a light ivory, indicating that the cornstarch is fully incorporated.
- Kitchen Hack: To avoid any risk of curdling, temper the egg yolk mixture by slowly adding a small amount of the hot milk to the yolks while whisking vigorously. This gradual increase in temperature prevents the eggs from scrambling. Once tempered, pour the yolk mixture back into the saucepan with the remaining hot milk. Stir continuously until the custard thickens, which should take about 5 minutes. The custard should coat the back of a spoon and leave a clear line when you run your finger through it.
- Remove the saucepan from heat and stir in the vanilla bean seeds and a tablespoon of the bean pod for extra aroma. The seeds add a subtle nutty flavor that elevates the custard. Let the custard sit for a minute to allow the vanilla to infuse. Then, strain the mixture through a fine sieve to remove any lumps or residual bean pods. The resulting custard should be silky smooth, with a glossy sheen that hints at its richness.
- Watch Out: The trickiest part of this recipe is achieving the perfect custard thickness. If you overcook, the custard will become too thick, resulting in a rubbery texture. If you undercook, it will be runny and fail to set. A simple test is to run a finger through the custard; if it leaves a clear line that doesn’t fill back in immediately, it’s ready. Keep the heat low and stir constantly to avoid scorching.
- Pour the custard into the pre‑baked crust, filling it to the top. Use a spatula to smooth the surface, ensuring an even layer. If you notice any air bubbles, gently tap the pan to release them. The custard should settle into the crust without spilling over. This step is critical for a uniform texture and a neat presentation.
- Kitchen Hack: While the custard is cooling, place a piece of parchment paper over the top of the pie. This prevents the custard from forming a skin and keeps the surface smooth. It also makes slicing easier later, as the parchment can be removed without disturbing the custard. This simple trick saves time and maintains the pie’s pristine appearance.
- Let the pie cool to room temperature, then refrigerate for at least 4 hours, preferably overnight. The custard will set and develop deeper flavors during this time. When you’re ready to serve, remove the pie from the fridge and let it sit at room temperature for 10–15 minutes to soften slightly. A well‑chilled custard offers a silky mouthfeel, while a slightly warmed custard enhances the vanilla aroma.
- Just before serving, dust the top with powdered sugar or drizzle a light caramel sauce for an extra touch of elegance. This final garnish adds a subtle sweetness and a visual pop that elevates the overall presentation. Serve the pie in individual slices, ensuring each forkful contains both crust and custard. The contrast of textures will keep guests coming back for more. Enjoy your masterpiece, knowing you’ve created a dessert that’s both classic and contemporary.
- That's it — you did it. But hold on, I've got a few more tricks that'll take this to another level. Keep experimenting with different vanilla sources, adjust the sugar level to your taste, and consider adding a splash of Grand Marnier for a boozy twist. The possibilities are endless, and each variation will bring a new dimension to this timeless pie. Remember, the secret lies in the details, so pay attention to every step. Your guests will thank you for this unforgettable dessert.
Insider Tricks for Flawless Results
The Temperature Rule Nobody Follows
Many bakers assume that a higher heat will speed up the custard, but that’s a recipe killer. The custard should be cooked over medium heat, and the temperature should never exceed 180°F (82°C). This gentle heat allows the proteins to set without scrambling the eggs. A quick test is to touch the back of a spoon; if it feels hot but not scalding, you’re good. Consistent temperature is the foundation of a silky custard.
Why Your Nose Knows Best
The aroma of vanilla is a powerful indicator of freshness. If the vanilla bean’s scent is faint or chemical, it’s time to upgrade to a fresh bean. A strong vanilla aroma signals that the beans are at their peak. The scent will permeate the custard, giving it that signature flavor. Trust your nose, and you’ll avoid bland custard.
The 5‑Minute Rest That Changes Everything
After you finish cooking the custard, let it rest for 5 minutes before pouring it into the crust. This brief rest allows the mixture to settle and the starch to fully activate. Skipping this step can result in a slightly runny custard. The rest also lets the flavors meld, creating a more harmonious taste. A small pause can make a huge difference.
The Perfect Crust Finish
If you want a crunchier crust, brush the edges with melted butter before baking. The butter will caramelize, adding a buttery crust that’s irresistible. Keep an eye on the crust; if it starts to brown too quickly, reduce the oven temperature. A golden crust is the hallmark of a well‑baked pie. This small touch elevates the entire dessert.
The Quick Cooling Trick
Once the custard is poured into the crust, cover the pie with a piece of parchment paper. This prevents a skin from forming on the surface. It also allows the custard to cool evenly, preventing a crusty top. When you remove the parchment, the custard will have a smooth, glossy finish. This trick is a game‑changer for first‑time pie makers.
The Final Touch
When serving, consider adding a small dollop of whipped cream or a sprinkle of toasted almond slivers. These additions add a contrasting texture and a burst of flavor. The whipped cream’s airy lightness balances the custard’s richness. Almond slivers bring a nutty crunch that’s delightful. These finishing touches transform a great pie into a showstopper.
Creative Twists and Variations
This recipe is a playground. Here are some of my favorite ways to switch things up:
Chocolate‑Infused Vanilla
Add a tablespoon of cocoa powder to the custard for a chocolate‑vanilla swirl. The chocolate adds depth and a slight bitterness that balances the sweetness. The crust remains the same, but the filling becomes a decadent treat. This variation is perfect for chocolate lovers who still crave vanilla.
Citrus Zest Surprise
Incorporate a teaspoon of lemon or orange zest into the custard for a bright, fresh twist. The citrus zest adds a subtle zing that lifts the flavor profile. The crust will remain buttery, while the filling takes on a lively character. This version is ideal for spring and summer gatherings.
Almond Crunch Layer
Fold toasted almond slivers into the custard before pouring it into the crust. The almonds add a nutty crunch that contrasts with the silky filling. The crust can be left plain or topped with a thin layer of almond butter for extra flavor. This variation is a hit with guests who love a bit of texture.
Caramel‑Swirl Delight
Swirl a caramel sauce into the custard before filling the crust. The caramel adds a buttery sweetness that pairs beautifully with vanilla. The crust will remain crisp, but the filling will have a glossy caramel sheen. This twist is a crowd‑pleaser for any dessert table.
Spiced Vanilla Fusion
Add a pinch of ground cinnamon or nutmeg to the custard for a warm, aromatic flavor. The spices will give the pie a comforting, holiday‑like feel. The crust stays the same, but the filling becomes more complex. This variation is perfect for fall and winter celebrations.
Boozy Vanilla Twist
Stir in a tablespoon of Grand Marnier or vanilla liqueur into the custard. The alcohol adds depth and a subtle citrus note. The crust remains buttery, but the filling gains an adult sophistication. This twist is great for a dinner party or a cozy night in.
Storing and Bringing It Back to Life
Fridge Storage
Store the assembled pie in the refrigerator for up to 48 hours. Keep it covered with plastic wrap or a lid to prevent it from absorbing odors. The custard will remain firm and creamy when chilled. When you’re ready to serve, let it sit at room temperature for 10 minutes to soften slightly. A quick chill keeps the flavors fresh and vibrant.
Freezer Friendly
If you need to freeze the pie, wrap it tightly in plastic wrap and then place it in a freezer bag. The pie can be frozen for up to two weeks. Thaw it in the refrigerator overnight before serving. The custard may become slightly watery, but a quick stir will restore its silky texture. Freezing is a convenient option for meal prepping.
Best Reheating Method
To reheat the pie, place it in a pre‑heated oven at 300°F (150°C) for 10 minutes. This gentle heat will warm the custard without overcooking it. Add a splash of water to the bottom of the pan to create steam, which helps keep the custard moist. After reheating, let it cool for a few minutes before serving. The pie will taste as good as freshly made.