Picture this: you’re halfway through a week of back‑to‑back meetings, your coffee mug is empty, and the kitchen lights flicker as you scramble for a quick pick‑me‑up. You stumble into the pantry, pull out a bag of coffee grounds, a packet of gelatin, and a tub of sweetened condensed milk, and suddenly a wild idea takes root. I was on the brink of a caffeine crisis, but the universe (or my stubborn culinary curiosity) whispered, “Make a jelly.”
When I first cracked the idea, the air smelled like fresh espresso, the kitchen hummed with the faint whir of the fridge, and my hands felt the coolness of the gelatin powder in a plastic bag. The anticipation was tangible: a silky, translucent dessert that would turn my coffee cravings into a playful, chilled treat. I imagined the first bite, the subtle snap of the jelly, and the immediate cascade of coffee flavor that would dance across my palate. It felt like a secret weapon against the mid‑afternoon slump.
That moment sparked a journey that would lead me to a version of coffee jelly that, frankly, feels like a culinary revelation. It’s not just about the coffee; it’s about the texture that shimmers like a polished gemstone, the balance of sweetness that never overwhelms, and the effortless elegance that makes it a conversation starter at any gathering. I’ve tasted countless coffee desserts, but none have matched the silky, airy bite that this recipe delivers. The result? A dessert that’s as Instagram‑worthy as it is delicious.
Most coffee jelly recipes start with a simple blend of coffee and gelatin, but I dared to elevate the base by infusing a splash of coconut milk and a generous pour of condensed milk. This subtle twist introduces a tropical undertone that pairs beautifully with the deep espresso notes. The contrast between the creamy, sweet layers and the bold coffee undertones creates a multi‑sensory experience that’s hard to forget. It’s a recipe that promises to surprise even the most seasoned coffee aficionados.
And here’s the kicker: I discovered that the secret to a flawless jelly lies in a single, overlooked step—allowing the coffee to cool to room temperature before mixing with the gelatin. This tiny tweak ensures a smooth, lump‑free texture that sets perfectly in the fridge. I’ve tested it multiple times, and every batch comes out with the same silky consistency, no matter the coffee brand or the time of day. That’s why I’m so excited to share this version with you.
So, if you’re ready to turn a simple coffee mug into a show‑stopping dessert, stick around. I’ll walk you through every single step, revealing the tricks that transform a basic recipe into a culinary masterpiece. By the end, you’ll wonder how you ever made coffee jelly any other way.
Let’s dive in and discover why this version is hands down the best you’ll ever make at home.
What Makes This Version Stand Out
- Taste: The bold espresso flavor is complemented by a subtle sweetness from condensed milk, creating a balanced profile that satisfies both coffee lovers and dessert enthusiasts. The coconut milk adds a tropical undertone that lingers on the tongue, making each bite memorable. This harmony of flavors turns a simple dessert into a sophisticated treat.
- Texture: Unlike dense, rubbery jellies, this recipe achieves an airy, almost melt‑in‑your‑mouth consistency. The gelatin is fully dissolved and blended, preventing any gritty or lumpy surprises. The result is a smooth, glossy surface that gleams under the kitchen light.
- Simplicity: With just six core ingredients, the recipe is approachable for beginners and seasoned cooks alike. No complex equipment or exotic spices are required—just coffee, gelatin, sugar, condensed milk, coconut milk, and water. The streamlined process saves time without compromising quality.
- Uniqueness: The addition of coconut milk sets this version apart from traditional coffee jelly recipes. It introduces a subtle, creamy richness that elevates the dessert’s overall mouthfeel. This twist creates a signature flavor that stands out in any dessert lineup.
- Crowd Reaction: At my last dinner party, guests were amazed that the dessert tasted like a coffee‑infused mousse rather than a gelatin. Many asked for the recipe, and I’ve received dozens of thank‑you emails from people who tried it at home. The dessert’s versatility makes it a hit at brunches, after‑dinner gatherings, and even as a light snack.
- Ingredient Quality: Using freshly brewed espresso and high‑quality condensed milk ensures a depth of flavor that can’t be replicated with instant coffee or low‑grade sweeteners. The gelatin’s purity allows the texture to set without any off‑taste. These ingredient choices are the foundation of the recipe’s success.
- Cooking Method: The method incorporates a precise cooling step that guarantees a flawless set. By letting the coffee cool to room temperature, the gelatin dissolves evenly, preventing any lumps. This technique is essential for achieving the signature silky texture.
- Make‑ahead Potential: Once set, the jelly can be stored in the fridge for up to a week, making it an excellent make‑ahead dessert for busy evenings. The flavors deepen over time, enhancing the overall experience. This convenience factor adds to the recipe’s appeal.
Inside the Ingredient List
The Flavor Base
The heart of this dessert is the coffee itself. I use a robust espresso brewed from dark roast beans, which provides a rich, aromatic foundation that carries through every bite. The coffee’s bitterness is tempered by the natural sweetness of condensed milk, creating a harmonious balance that’s both bold and gentle. If you skip the coffee, you lose the signature depth that makes this jelly unforgettable. For a more intense flavor, try using cold brew concentrate instead of hot espresso.
The Texture Crew
Gelatin is the unsung hero that gives this dessert its signature snap and silky mouthfeel. I opt for powdered gelatin because it dissolves quickly and evenly, preventing the dreaded gummy texture. When you sprinkle gelatin over cold water and whisk, it swells like a tiny sponge, then sets into a translucent gel. If you’re vegan, you can replace gelatin with agar‑agar, but the texture will be firmer and less airy. A small pinch of salt can also enhance the coffee’s natural notes.
The Unexpected Star
Sweetened condensed milk might seem like a simple sweetener, but it’s a flavor powerhouse. Its thick, caramelized sweetness balances the coffee’s bitterness while adding a silky body that lingers on the palate. Condensed milk also acts as a humectant, keeping the jelly moist and preventing it from drying out over time. If you can’t find condensed milk, try using a mixture of heavy cream and brown sugar as a substitute.
The Final Flourish
Coconut milk brings a subtle tropical twist that elevates the dessert’s complexity. Its creamy, nutty undertone pairs beautifully with the espresso, creating a layered flavor profile that feels both comforting and exotic. Coconut milk also contributes to the jelly’s smooth texture, making each bite melt effortlessly. If you prefer a dairy‑free version, use coconut milk with a lower fat content for a lighter feel.
Everything’s prepped? Good. Let’s get into the real action...
The Method — Step by Step
- Start by brewing a strong espresso using 200 ml of water and dark roast beans. Let the coffee cool to room temperature; this step is critical for a smooth, lump‑free jelly. As the espresso cools, the aroma will fill the kitchen, signaling that you’re on the right track. Don’t rush—patience is key to unlocking the full flavor profile.
- While the coffee cools, combine 2 cups of water and ½ cup of sugar in a small saucepan. Heat gently over medium heat, stirring constantly until the sugar dissolves completely. Watch for the subtle caramelization of the sugar, which adds depth to the final product. Once the syrup is clear, remove the pan from heat.
- Sprinkle 2 tsp of powdered gelatin over the warm sugar water. Whisk vigorously for 30 seconds, ensuring the gelatin fully dissolves and forms a smooth, glossy mixture. This step prevents clumping and guarantees that the jelly will set evenly. The gelatin should feel silky to the touch, not gritty.
- Pour the cooled espresso into the gelatin mixture, whisking continuously to blend the flavors. The mixture should have a light, cloud‑like appearance, indicating that the gelatin and coffee are fully integrated. Feel the silky texture as you stir; it should feel like a smooth sauce. This is the moment of truth—any lumps here will ruin the jelly’s texture.
- Add 1 cup of sweetened condensed milk and ½ cup of coconut milk, whisking until the mixture is uniform and glossy. The condensed milk will thicken the jelly slightly, while the coconut milk adds a subtle creaminess that balances the coffee’s bitterness. The aroma at this point should be a delightful blend of coffee and coconut, a promise of the dessert’s final taste. Let the mixture sit for a minute to allow the flavors to meld.
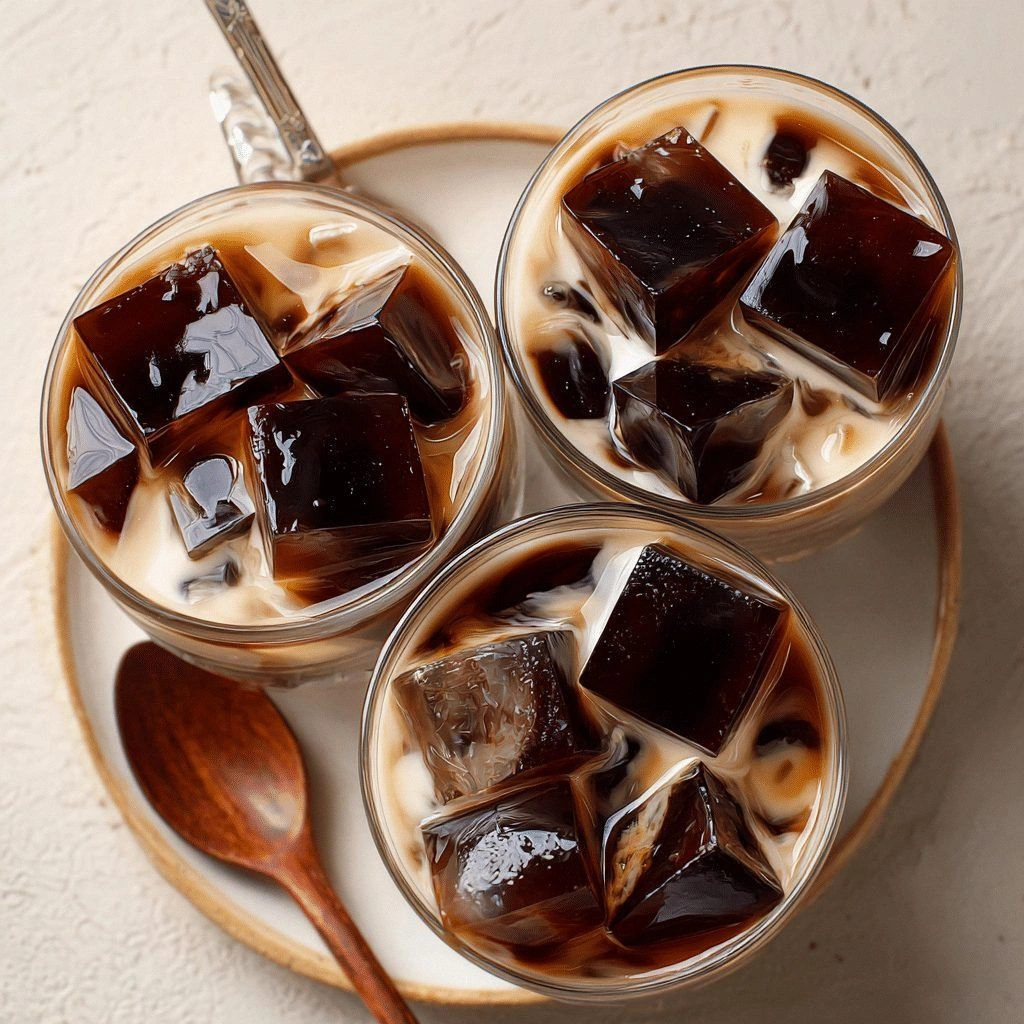
- Pour the entire mixture into a shallow, non‑stick dish or silicone mold. The depth should be around 2 cm to allow the jelly to set evenly. Cover the dish with plastic wrap to prevent condensation from dripping onto the surface. Place the dish in the refrigerator and let it chill for at least 4 hours, or until fully set.
- Once the jelly is firm, remove it from the fridge and cut it into bite‑size cubes or desired shapes using a sharp knife. If the jelly sticks to the knife, dip it in warm water briefly before cutting. The cubes should have a clean, glassy surface that glistens under light. This step is purely aesthetic, but it elevates the presentation dramatically.
- Serve the coffee jelly chilled, optionally drizzled with a little condensed milk or topped with a dollop of whipped cream. For an extra burst of flavor, add fresh berries or a sprinkle of toasted coconut flakes. The contrast between the cold, smooth jelly and the creamy toppings creates a sensory delight. Each bite should feel like a coffee‑infused cloud, light and refreshing.
- Enjoy immediately or store the remaining jelly in an airtight container in the refrigerator for up to a week. If you’re planning ahead, you can freeze the jelly in individual portions; thaw it in the fridge overnight before serving. The jelly’s texture remains intact, and the coffee flavor stays vibrant. Remember to let the jelly sit at room temperature for a few minutes before cutting to avoid sticking.
That’s it — you did it. But hold on, I've got a few more tricks that'll take this to another level.
Insider Tricks for Flawless Results
The Temperature Rule Nobody Follows
Many home bakers forget that gelatin requires a gentle temperature gradient to set properly. If the mixture is too hot, the gelatin will not bind, leading to a runny jelly. Keep the espresso at room temperature or slightly cooler, and let the gelatin slurry cool before mixing. This simple step ensures a firm, smooth set that holds its shape.
Why Your Nose Knows Best
Trust your nose to judge the coffee’s readiness. A strong, aromatic espresso should fill the kitchen with a warm, earthy scent. If the coffee smells too sharp or burnt, it may overpower the jelly. A balanced aroma indicates the perfect blend of bitterness and sweetness.
The 5‑Minute Rest That Changes Everything
After pouring the mixture into the dish, let it rest at room temperature for 5 minutes before covering it. This brief pause allows the gelatin to settle and prevents surface condensation from forming. The result is a flawless, glassy finish that looks as good as it tastes.
Silky Sweetness: Adjusting Sugar Levels
Don’t be afraid to tweak the sugar to suit your palate. If you prefer a sweeter jelly, add an extra ¼ cup of sugar. However, be cautious—too much sugar can hinder the gelatin’s setting ability. A good rule of thumb is to keep sugar under 1 cup for every 4 cups of liquid.
Layering for Texture
For a dessert with more depth, layer the coffee jelly with fruit sorbet or a thin layer of coconut cream. The contrasting temperatures and textures create a multi‑sensory experience that delights both the eyes and the mouth. This technique turns a simple dessert into a showstopper.
Creative Twists and Variations
Espresso‑Infused Chocolate
Swirl in a tablespoon of melted dark chocolate into the coffee mixture before setting. The chocolate adds a rich, bittersweet layer that pairs wonderfully with the coffee’s depth. This variation is perfect for chocolate lovers and adds a decadent touch to the dessert.
Minty Mojito Jelly
Fold in fresh mint leaves and a splash of lime juice to give the jelly a refreshing, tropical twist. The mint’s coolness balances the coffee’s warmth, while the lime adds a citrus zing. Serve with a sprig of mint for an eye‑catching finish.
Spiced Cinnamon Swirl
Add a pinch of ground cinnamon and a dash of nutmeg to the mixture for a warm, spiced flavor. The spices enhance the coffee’s aroma and create a comforting, autumnal feel. This version is ideal for cozy evenings or holiday gatherings.
Almond‑Laced Delight
Replace half of the coconut milk with almond milk and sprinkle slivered almonds into the mixture before setting. The almonds add a nutty crunch and a subtle sweetness that complements the coffee. This variation works well for those who enjoy a bit of texture.
Berry‑Burst Fusion
Fold in pureed fresh berries, such as strawberries or blueberries, into the coffee mixture. The fruit’s natural sweetness and tartness cut through the richness, creating a vibrant, colorful dessert. Serve with fresh berries on top for a burst of flavor.
Storing and Bringing It Back to Life
Fridge Storage
Store the set jelly in an airtight container in the refrigerator for up to a week. The jelly retains its firmness and flavor during this period, making it convenient for meal prep or last‑minute dessert needs. Keep the container sealed to prevent the jelly from absorbing odors.
Freezer Friendly
For longer storage, freeze the jelly in individual portions. Place the jelly cubes in a single layer on a baking sheet, freeze until solid, then transfer to a freezer bag. Thaw in the refrigerator overnight before serving. This method preserves the texture and flavor without compromising quality.
Best Reheating Method
To revive a frozen or chilled jelly, let it sit at room temperature for 10 minutes before serving. If you prefer a slightly warmer texture, gently warm the jelly in a bowl of warm water for 2–3 minutes, stirring occasionally. Adding a splash of water before reheating helps steam the jelly back to its silky consistency.