I still remember the first time I attempted cranberry lemon bars. It was a frigid Sunday in December, my kitchen smelled like a pine-scented candle had exploded, and I was desperately trying to bake something that would outshine my cousin's legendary peppermint bark at the family cookie swap. I pictured glossy squares with neon-bright filling and a crust so buttery it could make a French pastry chef blush. What I got was a sticky magenta swamp that glued itself to the pan like industrial cement and a filling that tasted like cough syrup's grumpy cousin. I served them anyway—because wasting butter feels like a felony—and watched my relatives nibble polite corners before "suddenly remembering" they were gluten-free. Fast-forward through three more botched batches, a mini existential crisis, and one triumphant eureka moment at 2:07 a.m. when I finally cracked the code. These cranberry lemon bars are the result of that obsessive quest: tangy-sweet, jewel-toned, and so addictive you'll hide the last row behind the kale in your fridge so nobody else finds them.
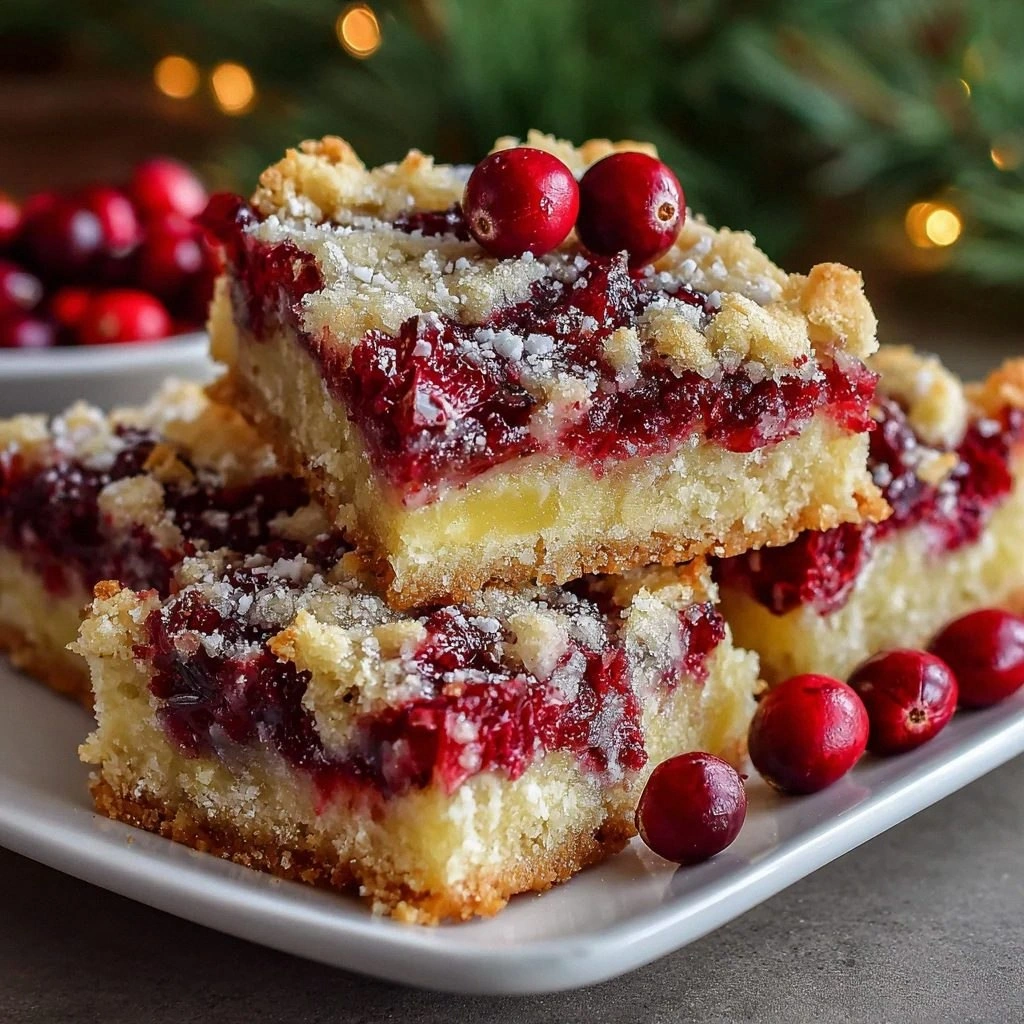
Picture this instead: You pull a gleaming pan from the oven, the surface of the filling shivering like a calm pond, the shortbread crust breathing out tiny sighs of buttered steam, the whole kitchen perfumed with bright citrus and the berry-red scent of holiday cheer. You let them cool, slice, dust with snow-powdered sugar, and bite. The crust crackles—think perfectly caramelized sugar meeting sandy shortbread—before giving way to a silky layer that tastes like liquid sunshine mixed with the punchy snap of cranberries. That first bite is pure winter magic: tart, sweet, buttery, and just rebellious enough to stand out amid all the chocolate and pumpkin on the dessert table.
This version beats every other recipe I've tried (and trust me, I've stalked them all—grandma hand-me-downs, celebrity-chef cookbooks, sketchy forums that also want to sell me kitchen knives). The difference comes down to three tiny but mighty tweaks: browning the butter for depth, using whole-berry cranberry sauce instead of the jellied can-shaped stuff, and par-baking the crust until it's practically toffee. Most recipes skip those steps and end up with a pasty bottom layer that sogs under the juicy filling like a sad sponge. Not here, friend.
Stay with me here—this is worth it. By the end of this post you'll know exactly when the crust is perfectly golden (hint: your nose will tingle), how to tame the cranberry so it complements rather than bulldozes the lemon, and why a quick stint in the freezer before slicing gives you Instagram-worthy sharp edges. Let me walk you through every single step—by the end, you'll wonder how you ever made it any other way.
What Makes This Version Stand Out
Tang-Tamed Filling: Most cranberry bars taste like a war between sugar and acid. We fix that by whisking cranberry sauce straight into a lemon curd base, mellowing the tang while keeping that ruby hue front and center. The result is balanced, bright, and won't make your cheeks pucker like you're sucking on a Sour Patch Kid.
Brown-Butter Shortbread: Instead of plain melted butter, we cook it until the milk solids toast into little hazelnut-flavored flecks. This single swap adds a caramel richness reminiscent of toffee, turning a humble crust into the star co-lead instead of a bland stage.
Par-Bake Precision: Under-baked crusts are the Achilles heel of bar cookies. We bake ours until it's the color of toasted almonds before the filling ever sees the pan. That extra ten minutes guarantees a crisp, sturdy foundation that won't collapse under juicy filling.
Make-Ahead Magic: These bars actually improve after a night in the fridge; the flavors meld into a cohesive sweet-tart symphony. Prep on Wednesday, dazzle on Friday, look like a holiday hero while everyone else is stress-kneading cinnamon rolls at dawn.
One-Bowl Lemon Layer: No fussy double boilers or stand mixers cluttering your counter. Whisk, whisk, pour, bake. If you can scramble eggs, you can master this filling.
Crowd-Shock Factor: People expect pumpkin pie and sugar cookies in December. Slide a platter of ruby-tinted lemon bars into the mix and watch eyes widen. They're familiar enough to comfort, surprising enough to spark conversation.
Ingredient Integrity: No fake extracts, no neon food dye, no "lemon flavoring" that tastes like furniture polish. Fresh lemon zest plus real cranberry sauce equals pure, unapologetic flavor.
Alright, let's break down exactly what goes into this masterpiece...
Inside the Ingredient List
The Flavor Base
Salted butter is the unsung hero here. I know, everyone tells you to use unsalted so you can "control the salt." But salted butter layers in that whisper of salinity that makes citrus sing and keeps the cranberry from bulldozing your palate. Let it soften to room temperature so it creams into sugary clouds without leaving greasy butter pebbles. Skip this step and you'll have pockets of fat that melt into sad craters in your crust. If all you have is unsalted, add a scant quarter-teaspoon of fine sea salt to the dough and move on with life.
Granulated white sugar provides straightforward sweetness. Yes, you could flirt with brown sugar, but the molasses notes muddy the bright cranberry-lemon duet. Measure it like you mean it; too little and the filling tastes like a sour candy, too much and you'll obliterate that zippy freshness we want.
The Texture Crew
All-purpose flour is our structural engineer. It gives the crust its snap and the filling enough body to slice cleanly. If you live at high altitude, add two extra tablespoons to keep things from sliding into a slump. Substitute with half whole-wheat pastry flour if you enjoy a nutty undertone, but expect a slightly denser bite.
Large eggs act as the quiet binder in the filling, transforming liquid lemon-cranberry into silky, sliceable custard. Room-temperature eggs whisk more smoothly, so plop them in a bowl of warm tap water while you prep the crust. Skip cold eggs and you'll spend an extra minute whisking lumps that refuse to cooperate.
The Unexpected Star
Whole-berry cranberry sauce is the twist that separates these bars from every lemon square you've met. Jellied sauce slides in like a sugary imposter; whole berries burst and ribbon through the filling, giving you pockets of tartness and pops of color. Pick a quality brand or use last week's homemade batch lingering in the fridge. No cranberry sauce? You can simmer fresh berries with a splash of OJ and sugar until they pop, but expect a slightly looser texture.
The Final Flourish
Fresh lemon juice is non-negotiable. That bottle shaped like a lemon that lives in your fridge door is fine for emergency tea, but here it tastes like Pledge. Zest first, juice second—the zest holds the essential oils that perfume the entire dessert. One large lemon typically yields two teaspoons of zest plus three tablespoons of juice, exactly what we need.
Everything's prepped? Good. Let's get into the real action...
The Method — Step by Step
- Preheat your oven to 350 °F (175 °C) and line an 8-inch square pan with parchment, leaving wings on two sides so you can lift the bars out later like a golden raft of deliciousness. Slide the pan into the oven while it heats—this tiny head start prevents crust shrinkage. Meanwhile, place the butter in a small stainless skillet over medium heat. Swirl occasionally until it melts, foams, then suddenly smells like toasted nuts and the milk solids turn chestnut brown. This takes about four minutes; blink and it burns, so keep watching. Pour the brown butter into a bowl and let it cool five minutes so it won't scramble the dough.
- In a mixing bowl, whisk the granulated sugar with the warm brown butter until the mixture looks like wet sand at low tide. Stir in the vanilla extract; the aroma will bloom like you've uncorked a bottle of bakery air. Add the flour and stir just until no dry streaks remain. The dough will feel like soft Play-Doh and smell like caramel candy—resist nibbling half of it.
- Dump the dough into your pre-warmed pan and press it into an even layer using the flat bottom of a measuring cup. You want it snug in the corners so citrus filling can't seep underneath and create soggy caverns. Slide the pan into the oven and bake for 15 minutes, or until the edges turn pale gold and your kitchen smells like a hazelnut latte. Remove and let it chill while you whisk the topping; this par-bake is the insurance policy against limp crust syndrome.
- For the filling, whisk the eggs and sugar in a large bowl until the mixture looks like pale lemonade and falls off the whisk in thick ribbons. Whisk in lemon zest, juice, and cranberry sauce until the mixture is a vibrant ruby-butterscotch color. Finally fold in the flour; this prevents the filling from weeping once baked. The batter will be pourable and smell like summer carnival lemonade mixed with holiday cranberry spice.
- Pour the filling over the warm crust, tilting the pan so it spreads into the corners without creating air pockets. Return to the oven and bake 20–22 minutes, or until the edges are set but the center still jiggles like Jell-O when you nudge the pan. Over-baking is the mortal sin of lemon bars; they firm as they cool, so channel your patience. Your kitchen will smell like a citrus-cranberry sunrise.
- Cool completely on a wire rack, then refrigerate at least two hours to let the flavors meld and the filling set to silky perfection. Use the parchment wings to lift the slab onto a cutting board. For sharpest slices, heat a chef's knife under hot water, wipe dry, and cut in confident downward strokes. Wipe the blade between cuts for bakery-window presentation. Dust with powdered sugar just before serving so it doesn't dissolve into damp patches.
- Store leftovers (if such things exist) in an airtight container in the fridge for up to five days or freeze for up to two months. They actually improve after a night in cold storage—the filling tightens, the crust mellows, and the flavors sing in four-part harmony. Bring back to room temp for 15 minutes or serve icy-cold for a refreshing contrast to hot coffee.
That's it—you did it. But hold on, I've got a few more tricks that'll take this to another level...
Insider Tricks for Flawless Results
The Temperature Rule Nobody Follows
Room-temperature eggs and butter mix into a smooth emulsion that bakes evenly. Cold eggs can cause the filling to separate into a lumpy layer and a watery puddle. If you forgot to pull them out ahead, submerge eggs in warm (not hot) tap water for five minutes while you gather gear. Same with the cranberry sauce—cold sauce straight from the can can seize the batter. A quick 15-second zap in the microwave brings it to a friendly lukewarm that blends seamlessly.
Why Your Nose Knows Best
Trust your sense of smell more than the timer. When the crust turns fragrant with toasted-nut notes, it's done par-baking. When the filling smells bright and cranberry-citrusy without any eggy odor, it's set. Ovens vary, but aroma is universal. A friend once asked why her bars tasted "flat." She pulled them 90 seconds too early because the clock said so; the filling never developed that caramelized complexity that only heat can coax.
The 5-Minute Rest That Changes Everything
After baking, let the pan rest on a wire rack for five minutes before refrigerating. Rapid chilling can cause the filling to contract and crack like a desert lakebed. Those few minutes of gentle cooling prevent surface fissures and give the starches a chance to finish gelling. Once barely warm, slide the pan into the fridge uncovered so condensation doesn't rain onto the glossy top.
Creative Twists and Variations
This recipe is a playground. Here are some of my favorite ways to switch things up:
Key Lime Cranberry Bars
Swap lemon juice and zest for key lime, and add a whisper of coconut extract to the crust. The tropical-cranberry combo tastes like Christmas on a Caribbean beach. Garnish with toasted coconut flakes for bonus vacation vibes.
Rosemary-Infused Holiday Edition
Steep a sprig of fresh rosemary in the melted butter for 10 minutes, then remove before browning. The piney herb subtly echoes winter evergreen and makes people ask, "What's that amazing note I can't place?"
Blood Orange Cranberry Bars
Replace half the lemon juice with blood orange juice for a sunset-colored filling. The berry-red cranberry plus ruby orange creates a gradient worthy of a Renaissance painting.
Almond Crust Swap
Substitute ¼ cup of the flour with finely ground almonds. The nutty flavor marries beautifully with brown butter and adds a marzipan whisper that almond lovers will adore.
Meringue-Capped Cran-Lemon Clouds
Whip up a stiff Italian meringue, pipe rosettes on top of cooled bars, and torch lightly for a lemon-cranberry pavlova vibe. The airy sweetness plays against the tart filling like culinary yin and yang.
Spiced Orange Cranberry Bars
Whisk ¼ teaspoon each of ground cardamom and cinnamon into the filling. The warm spices give the bars a Scandinavian hygge quality that's pure comfort on a snowy night.
Storing and Bringing It Back to Life
Fridge Storage
Refrigerate bars in an airtight container, layers separated by parchment, for up to five days. The flavor actually peaks on day two when the filling relaxes into the crust. Avoid storing while still warm—condensation will drip onto the surface and create a sticky skin nobody wants.
Freezer Friendly
Freeze cut bars on a parchment-lined tray until solid, then transfer to a zip-top bag with as much air removed as possible. They keep up to two months without flavor loss. Thaw overnight in the fridge or at room temp for 30 minutes. For a frozen-cheesecake vibe, eat them partially thawed; the filling becomes fudgy and dense.
Best Reheating Method
These bars are meant to be served cool or room temp, but if you like contrast, warm a bar in a 300 °F oven for five minutes. The crust regains its snap and the filling softens to pudding texture. Ten seconds in the microwave works too, but the crust won't crisp.