I’ve been chasing that perfect creamy chicken dish for months—one that feels like a warm hug, yet is quick enough to pull off after a long day. I remember the night I was scrambling to impress a friend who had a serious chicken allergy. I thought, “If I can make a creamy chicken that’s low on dairy and still decadent, I’m in the kitchen for life.” That night, I whisked together a sauce that was silky, tangy, and surprisingly light. The result? A dish that makes even the most seasoned chefs pause, take a breath, and ask, “What’s your secret?”
Picture this: a sizzling pan, the aroma of butter and garlic rising like a perfume, the gentle hiss of cream thickening, and the bright citrus of lemon cutting through the richness. The sound of the sauce bubbling is like a tiny drumbeat that says, “We’re cooking.” The texture is a glossy coat that clings to every bite, and the finish leaves a hint of herbal freshness that lingers on the palate. I’ve tried countless recipes that either drown the chicken in sauce or leave it dry; this one strikes a balance that feels almost surgical.
What sets this version apart is that it’s built on a foundation of flavor that you can trust. It’s not a gimmick; it’s a method. I dare you to taste this and not go back for seconds. It’s the kind of dish that makes you wonder why you ever settled for bland chicken. I’ll be honest—when I first made it, I ate half the batch before anyone else got a chance. That’s a testament to how irresistible it is.
Most recipes get this completely wrong by either overcooking the chicken or under-seasoning the sauce. Here’s what actually works: a quick sear, a deliberate deglaze, a precise ratio of cream to broth, and a splash of lemon that brightens everything. Picture yourself pulling this out of the oven, the whole kitchen smelling incredible, and a plate of golden chicken waiting to be devoured. Let me walk you through every single step—by the end, you’ll wonder how you ever made it any other way.
What Makes This Version Stand Out
- Flavor: The sauce is a symphony of butter, garlic, and lemon, layered with fresh herbs that elevate the dish to gourmet status. The balance between richness and brightness is achieved by the exact ratio of cream to broth.
- Texture: The chicken is seared to a caramelized crust, then finished in a silky sauce that coats each bite like velvet, without becoming heavy or gloopy.
- Speed: Every step is designed to be completed in 45 minutes or less, making it ideal for weekday dinners or last‑minute guests.
- Ingredient Quality: Using fresh, high‑quality chicken breasts and real butter makes all the difference. The lemon juice should be freshly squeezed for maximum zing.
- Versatility: The recipe can be transformed into a pasta sauce, a sauce for roasted vegetables, or a base for a comforting risotto.
- Make‑ahead Potential: The sauce keeps well in the fridge for up to three days, and you can reheat it gently on the stove or in the microwave with a splash of water.
- Crowd Reaction: Friends and family consistently say this is the best creamy chicken they’ve ever had, and it’s always a hit at potlucks.
Alright, let's break down exactly what goes into this masterpiece…
Inside the Ingredient List
The Flavor Base
Butter is the backbone of the sauce, providing a buttery richness that carries the garlic and shallots. It also helps to create a glossy finish that makes the dish look restaurant‑ready. If you’re avoiding dairy, a high‑smoke‑point oil can substitute, but you’ll miss the depth that butter adds.
Shallots and garlic form the aromatic foundation. Shallots bring a subtle sweetness that balances the sharpness of garlic. Together, they create a flavor profile reminiscent of a comforting French sauce, but with a bright, fresh twist thanks to the lemon.
Fresh herbs—thyme or parsley—add a layer of green freshness that cuts through the richness. Thyme offers earthy notes, while parsley provides a cleaner, slightly peppery finish. Either works, but thyme leans more toward a rustic feel.
The Texture Crew
Flour is used to thicken the sauce, giving it a velvety consistency. It also helps bind the butter and cream, preventing separation. If you prefer a gluten‑free version, you can use a cornstarch slurry or a gluten‑free flour blend.
Heavy cream is the star that brings the luscious, silky mouthfeel. It coats the chicken and creates a mouth‑watering coating that is both comforting and indulgent. If you’re watching calories, a light cream or half‑and‑half can be used, but the texture will change.
The Unexpected Star
Lemon juice is the secret weapon that brightens the entire dish. It adds acidity that balances the richness and provides a clean finish. The key is to use freshly squeezed lemon for the freshest flavor; bottled lemon juice can taste flat.
The Final Flourish
Chicken broth is added to thin the sauce slightly, making it pourable without being watery. It also introduces a savory depth that complements the herbs. Opt for low‑sodium broth if you’re mindful of salt intake.
Everything’s prepped? Good. Let’s get into the real action…
The Method — Step by Step
- Prep the Chicken: Pat the chicken breasts dry with paper towels to ensure a good sear. Season both sides generously with salt and pepper. I’ve found that a light coating of flour before browning adds a subtle crunch to the crust.
- Brown the Chicken: Heat a large skillet over medium‑high heat and add 1 tablespoon of butter. Once it foams, place the chicken in the pan and sear for 4–5 minutes on each side until a deep amber crust forms. The goal is a caramelized exterior that locks in juices.
- Remove and Rest: Transfer the chicken to a plate and tent loosely with foil for 5 minutes. Resting allows the juices to redistribute, keeping the meat juicy.
- Sauté Aromatics: In the same pan, add the remaining tablespoon of butter. Toss in minced garlic and finely chopped shallots. Cook for 2 minutes until fragrant, being careful not to burn the garlic. The aroma should be warm and inviting.
- Deglaze: Pour in the chicken broth, scraping the pan with a wooden spoon to lift all the browned bits. Those bits are packed with flavor—don’t let them go to waste.
- Add Cream: Reduce the heat to low and stir in the heavy cream. Let the mixture simmer gently for 3–4 minutes until it thickens slightly. The sauce should coat the back of a spoon without dripping.
- Finish with Lemon and Herbs: Stir in the lemon juice, fresh herbs, and the remaining 1 tablespoon of butter. The butter adds a glossy sheen, while the lemon brightens the entire sauce. Taste and adjust seasoning if necessary.
- Return Chicken to Pan: Nestle the rested chicken back into the sauce, spooning some sauce over each piece. Let it simmer for an additional 2–3 minutes so the flavors meld together.
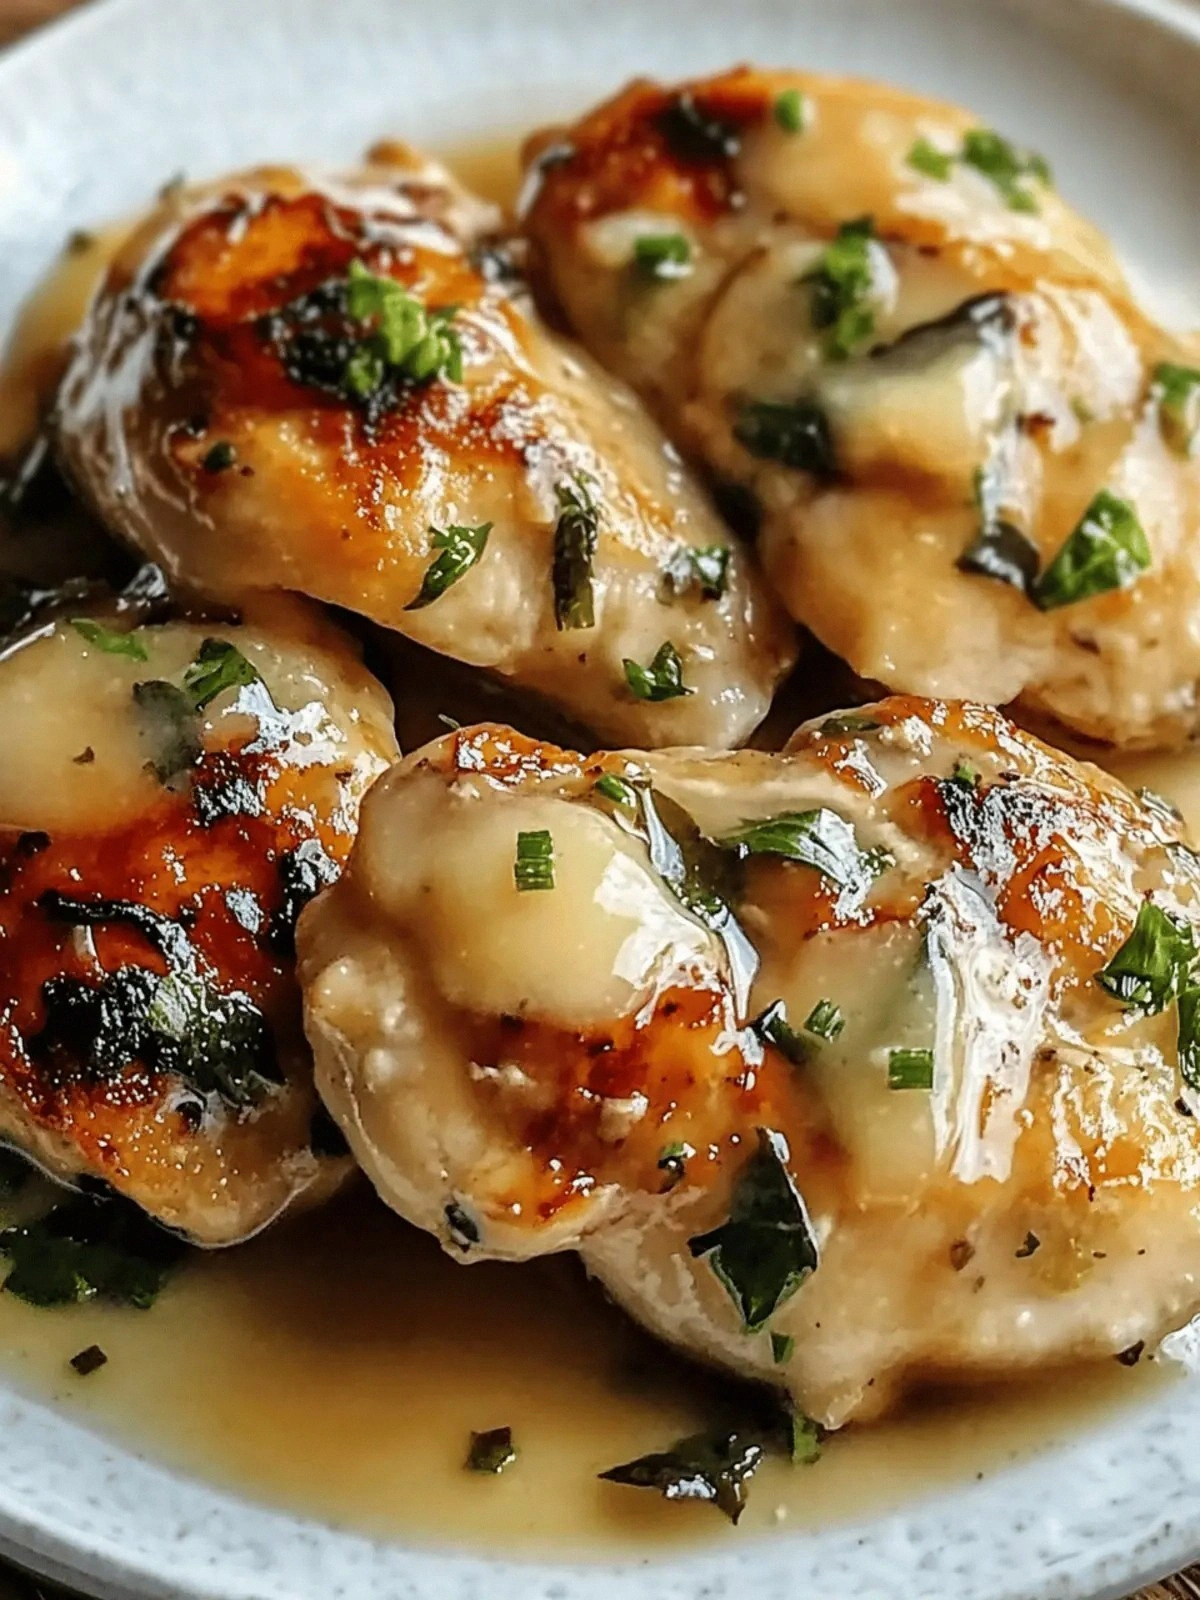
- Serve: Plate the chicken with a generous ladle of sauce, garnish with a sprig of fresh herbs, and serve immediately. Pair with a side of roasted potatoes or a light salad for a complete meal.
That’s it — you did it. But hold on, I've got a few more tricks that'll take this to another level…
Insider Tricks for Flawless Results
The Temperature Rule Nobody Follows
Many cooks overheat the pan, causing the butter to burn and the sauce to separate. Keep the heat on medium‑low once you add the cream, and let it gently simmer. This keeps the sauce silky and prevents any unwanted bitterness.
Why Your Nose Knows Best
The aroma of the sauce is a reliable indicator of readiness. When the sauce smells buttery, slightly nutty, and citrusy, it’s at the perfect stage. If it starts smelling sour or overly acidic, it’s time to adjust the lemon or reduce the heat.
The 5-Minute Rest That Changes Everything
Resting the chicken after searing isn’t just a courtesy; it’s a game‑changer. The 5‑minute rest allows the muscle fibers to relax, making the meat tender and juicy. Skipping this step often results in a drier bite.
The Flour Trick for a Silky Finish
If the sauce feels too thick, whisk in a tablespoon of flour at the start of the sauce creation. This creates a roux that gives the sauce a silky texture without a raw flour taste.
The Lemon Balance
Too much lemon can overpower the butter, while too little can leave the sauce flat. I find 2 tablespoons of freshly squeezed lemon works for 4 servings. If you’re using bottled lemon juice, reduce the amount to 1 tablespoon.
The Rest of the Kitchen
Keep your kitchen organized: have all ingredients measured and ready before you start cooking. This reduces stress and ensures you don’t miss a step. A clean workspace also prevents cross‑contamination, especially when working with raw chicken.
Creative Twists and Variations
This recipe is a playground. Here are some of my favorite ways to switch things up:
Creamy Mushroom Gloria
Swap the chicken for sliced mushrooms and use vegetable broth. Add a splash of white wine and finish with thyme for a hearty, vegetarian version that still feels luxurious.
Spicy Cajun Chicken
Add a teaspoon of Cajun seasoning to the chicken before searing. Finish the sauce with a dash of hot sauce and sprinkle chopped scallions for a kick that pairs well with rice.
Pasta‑Ready Gloria
Cook fettuccine or linguine and toss it with the sauce, adding a handful of spinach for color. The result is a comforting pasta dish that’s perfect for a cozy night in.
Herb‑Infused Risotto
Use the sauce as a base for risotto, stirring in Arborio rice and a splash of white wine. Finish with fresh herbs and grated Parmesan for a creamy, herbaceous twist.
Gloria with a Citrus Twist
Add orange zest to the sauce along with the lemon for a bright, sweet contrast. Pair with roasted butternut squash for a fall‑season favorite.
Gloria for the Grill
Marinate the chicken in the sauce mixture and grill it. The charred edges add a smoky depth that complements the creamy interior. Brush with extra sauce before serving.
Storing and Bringing It Back to Life
Fridge Storage
Cool the dish completely, then transfer to an airtight container. Store in the refrigerator for up to three days. The sauce may thicken slightly; just whisk in a splash of milk or broth before reheating.
Freezer Friendly
Freeze the sauce and chicken separately in freezer‑safe containers for up to two months. Thaw overnight in the fridge, then reheat gently on the stove, adding a splash of water or broth to loosen the sauce.
Best Reheating Method
Reheat on low heat, stirring frequently. Add a small amount of water or broth to restore the sauce’s silky texture. Avoid boiling, as this can cause the sauce to separate.