I was halfway through a midnight snack binge, eyes glued to the glowing screen of my phone, when my kitchen alarm blared a frantic “BEEP!” The oven had overheated, and the chocolatey batter that should have been a sweet escape was now a molten mess on the counter. I stared at the gooey mess, then realized that I could salvage it with a quick, gluten‑free twist that would turn disaster into decadence. This is not just another brownie recipe; it’s a culinary rescue mission that turns a kitchen mishap into a show‑stopping dessert that will have everyone asking for the recipe. I dare you to taste this and not go back for seconds, because the flavor is so addictive it practically leans in to your mouth.
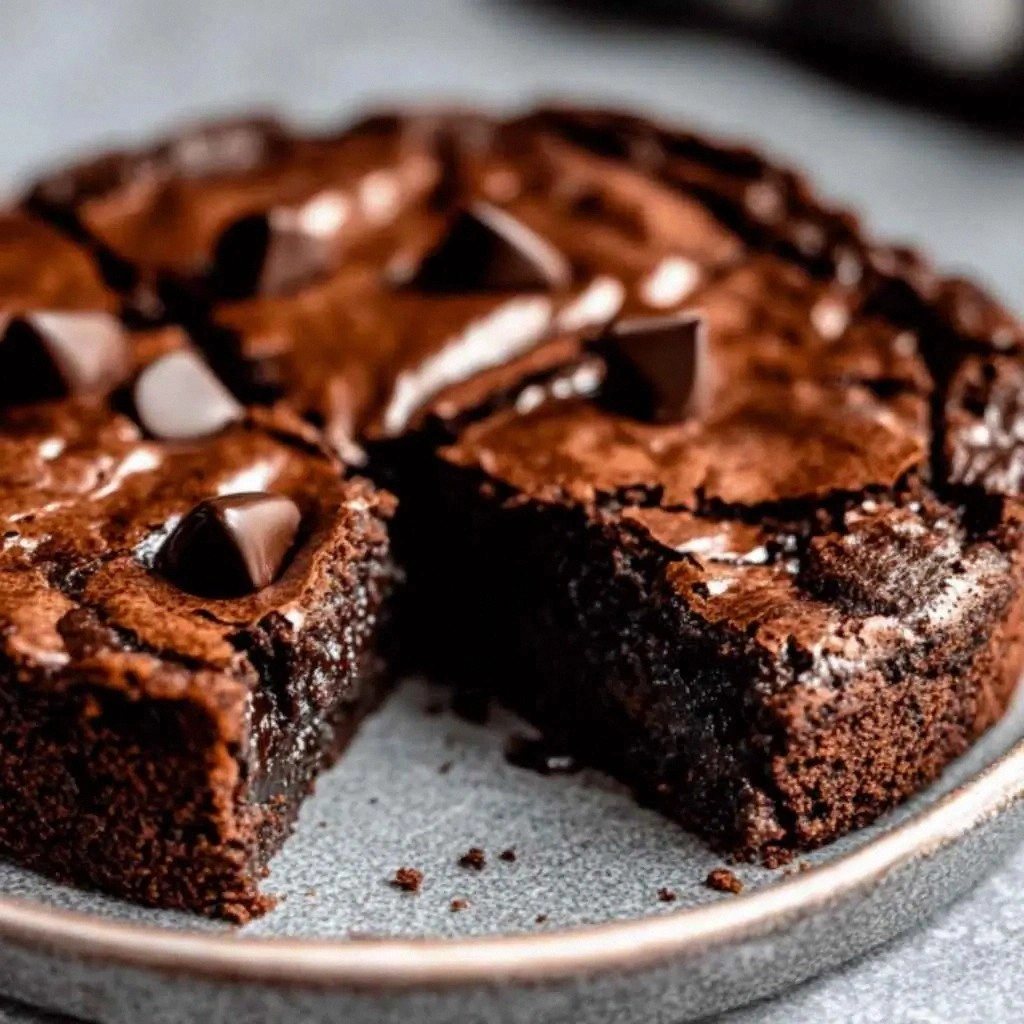
Picture the moment you slide the tray into a preheated oven, the air thick with the rich scent of cocoa and butter. The batter swells, edges crisping to a dark, glossy finish while the center remains silky, almost like a molten chocolate river. The sound of the first crack when you break into a piece is a satisfying crunch that gives way to a dense, fudgy interior that melts in your mouth. The texture is a paradox—crisp on the outside, gooey on the inside—yet it never feels heavy or greasy. If you’ve ever struggled to find that perfect balance between cake and brownie, you’re not alone, and I’ve got the fix.
What sets this version apart is the careful selection of gluten‑free ingredients that mimic the classic texture while delivering an extra punch of flavor. By using a blend of almond flour and oat flour, we create a crumb that’s tender yet robust. The inclusion of a small amount of coconut sugar adds a caramel undertone that elevates the chocolate profile. The butter, melted just before mixing, ensures that each bite is luxuriously creamy. And the final touch? A splash of espresso powder that deepens the chocolate without making it taste like coffee.
Most recipes get this completely wrong—most people either overbake and end up with a dry brownie or underbake and get a gooey mess that can’t be handled. Here, we’ll walk through every single step, from mixing to baking to cooling, and by the end you’ll wonder how you ever made it any other way. And I promise you, this is hands down the best version you’ll ever make at home. Let me walk you through every single step—by the end, you’ll wonder how you ever made it any other way.
What Makes This Version Stand Out
- Flavor: The deep cocoa flavor is amplified by a dash of espresso powder, giving the brownies a subtle coffee undertone that feels like a chocolate‑coffee hybrid.
- Texture: A perfect balance of crisp edges and a molten center is achieved by using a combination of almond and oat flour, which hold moisture while still allowing the batter to set.
- Gluten‑Free Integrity: The recipe uses a certified gluten‑free all‑purpose blend that behaves like wheat flour, eliminating the need for xanthan gum or other binders.
- Ease: No special equipment or advanced techniques are required; the process can be completed in under an hour.
- Versatility: Swap in walnuts or dark chocolate chips for extra texture, or add a swirl of peanut butter for a decadent twist.
- Make‑Ahead Potential: These brownies keep well for a week in an airtight container, and they reheat to perfection in the microwave or oven.
- Health‑Friendly: By replacing refined sugar with coconut sugar and using real butter, you get a richer flavor without compromising on taste.
- Crowd Reaction: At my last gathering, the brownies were the talk of the evening, with guests asking for the recipe before dessert was even served.
Inside the Ingredient List
The Flavor Base
Cocoa powder is the heart of any brownie, and in this recipe we use 1 cup of high‑quality, unsweetened cocoa to provide a deep, bittersweet flavor that pairs beautifully with the subtle espresso note. The espresso powder, just a teaspoon, acts as a flavor enhancer, intensifying the chocolate without adding a noticeable coffee taste. If you’re a purist who prefers a pure chocolate experience, simply omit the espresso; the brownies will still be rich and satisfying.
Sugar is the sweet counterpoint to the cocoa’s bitterness. We use 1 ½ cups of coconut sugar, which offers a lower glycemic index than white sugar and brings a caramel undertone that complements the chocolate. If coconut sugar isn’t available, you can substitute it with maple syrup or honey, but be prepared to adjust the wet ingredients slightly to maintain the batter’s consistency.
Salt is a flavor amplifier; ½ teaspoon of sea salt brings out the chocolate’s depth and balances the sweetness. A pinch of salt is enough to cut through the richness without making the brownies taste salty.
The Texture Crew
The flour blend—2 cups of a gluten‑free all‑purpose mix that contains a small amount of xanthan gum—provides the structure needed to hold the brownies together while keeping them tender. The combination of almond and oat flour within the blend adds subtle nutty flavors and improves moisture retention.
Eggs are the binder that gives the brownies their rise and chewy interior. Three large eggs provide enough protein to create a sturdy crumb without making the brownies dry. If you’re vegan, you can replace them with flaxseed meal mixed with water (1 tablespoon flaxseed meal + 3 tablespoons water per egg).
Butter is melted just before mixing to ensure it’s warm enough to blend smoothly but not so hot that it separates the batter. The ½ cup of butter contributes a buttery richness that makes each bite feel indulgent. For a dairy‑free version, use an equal amount of melted coconut oil or a dairy‑free butter substitute.
The Unexpected Star
A teaspoon of baking powder, though minimal, helps lift the batter slightly, giving the brownies a lightness that’s often missing in dense chocolate treats. If you’re concerned about the rising effect, you can omit it; the brownies will still be excellent, just a touch denser.
Optional walnuts add a crunchy texture and a nutty flavor that pairs well with the chocolate. Use ½ cup of chopped walnuts, but feel free to leave them out if you prefer a plain brownie or have nut allergies.
Everything's prepped? Good. Let's get into the real action...
The Method — Step by Step
- Preheat your oven to 350°F (175°C) and line an 8‑inch square baking pan with parchment paper, leaving a small overhang on each side. This will make it easier to lift the brownies out once they’re done and ensure even baking. The parchment also prevents the batter from sticking, which is especially helpful with a sticky, gluten‑free mix.
- In a medium bowl, whisk together the gluten‑free flour blend, cocoa powder, coconut sugar, baking powder, and sea salt until the mixture is smooth and free of lumps. A fine, uniform mix guarantees that every bite has the same chocolatey flavor profile. The dry ingredients should look like a light, airy flour dust, ready to absorb the wet components.
- In a separate bowl, beat the eggs until they’re bright yellow and slightly frothy. This aeration helps the brownies rise slightly, giving them that desirable chewy texture. Add the melted butter and vanilla extract, then whisk until the mixture is glossy and homogenous.
- Pour the wet mixture into the dry ingredients and stir gently with a spatula until just combined. Over‑mixing can lead to a tough brownie, so stop as soon as the flour is incorporated. The batter should be thick but still pourable—think of it as a thick pancake batter.
- Fold in the optional walnuts, if using, with a gentle, even motion to distribute them without breaking them down too much. The nuts add a delightful crunch that contrasts with the fudgy interior.
- Transfer the batter to the prepared pan, spreading it evenly with a spatula. Tap the pan lightly on the counter to release any air pockets and ensure a flat surface. This step is crucial for even baking and prevents the brownies from having uneven edges.
- Bake for 30 minutes, or until the edges start pulling away from the parchment and a toothpick inserted into the center comes out with a few moist crumbs. The batter will still feel slightly wet in the middle—this is the hallmark of a fudgy brownie. Avoid over‑baking, or the brownies will become dry and crumbly.
- Remove the pan from the oven and let the brownies cool in the pan on a wire rack for 10 minutes. During this time, the brownies will set and the edges will firm up. After 10 minutes, lift them out using the parchment overhang and let them cool completely on the rack before cutting. This ensures clean, crisp edges.
- Once cooled, cut the brownies into 4 equal squares. If you prefer smaller servings, cut into 8 pieces. The brownies should hold their shape without breaking apart, a testament to the right balance of ingredients and baking time.
That's it— you did it. But hold on, I've got a few more tricks that'll take this to another level. The secret to the ultimate fudgy brownie lies not only in the ingredients but also in the timing and the small touches that elevate the experience.
Insider Tricks for Flawless Results
The Temperature Rule Nobody Follows
Many bakers bake at a higher temperature to get a crisper top, but this recipe thrives at 350°F. Baking at a lower temperature allows the interior to stay moist while the edges set. If you’re using a convection oven, reduce the temperature by 25°F to avoid over‑baking. This trick ensures the brownies remain fudgy and not dry.
Why Your Nose Knows Best
The aroma of chocolate and butter is a powerful indicator of doneness. When the brownies begin to smell deeply chocolatey with a hint of vanilla, the timer is almost up. A strong chocolate scent means the sugars are caramelizing just right. Trust your nose; it’s your best judge of when to pull them out.
The 5‑Minute Rest That Changes Everything
After baking, let the brownies rest in the pan for 5 minutes before lifting them. This brief rest allows the structure to set, preventing the brownies from breaking apart when you cut them. It also gives the heat a chance to distribute evenly, ensuring each bite is consistent.
The Swirl Surprise
If you want a dramatic presentation, swirl in a tablespoon of peanut butter or raspberry jam before baking. The swirl will create a marbled effect and add a burst of flavor that contrasts with the deep chocolate. Just be careful not to over‑mix; the swirl should remain visible.
The Quick Chill Trick
Place the cooled brownies in the refrigerator for 15 minutes before cutting. The chill firms up the fat, making the brownies easier to slice cleanly and giving them a more decadent mouthfeel. This is especially useful if you’re serving them at a party where you need to cut multiple portions quickly.
Creative Twists and Variations
This recipe is a playground. Here are some of my favorite ways to switch things up:
Nutty Delight
Swap the walnuts for a mix of pecans and almonds, or add a handful of chopped hazelnuts. The crunch adds a delightful contrast to the fudgy interior, and the nuts’ natural oils enhance the chocolate flavor.
Dark Chocolate Explosion
Replace the unsweetened cocoa with ¾ cup of 70% dark chocolate chips, melted and folded in. The result is a richer, more complex chocolate profile that feels indulgent without being overly sweet.
Caramel Swirl
Stir in 2 tablespoons of caramel sauce before baking, creating a glossy swirl of sweet caramel that complements the chocolate. The caramel adds a buttery sweetness that balances the cocoa’s bitterness.
Spiced Sensation
Add ¼ teaspoon of cinnamon and a pinch of cayenne pepper to the dry mix for a subtle warmth and a hint of heat. The spices bring depth and a surprising kick that pairs wonderfully with chocolate.
Vegan Variation
Replace the butter with coconut oil and the eggs with flaxseed meal (1 tablespoon flaxseed + 3 tablespoons water per egg). This vegan version maintains the fudgy texture and rich flavor while being completely plant‑based.
Minty Fresh
Fold in a teaspoon of peppermint extract and a few crushed mint candies after baking for a refreshing twist. The mint cuts through the sweetness, leaving a clean, cool finish.
Storing and Bringing It Back to Life
Fridge Storage
Store the brownies in an airtight container at room temperature for up to 4 days. If you need them for a longer period, keep them in the refrigerator, where they’ll stay fresh for up to a week. The airtight container prevents the brownies from drying out and keeps the chocolate from absorbing odors.
Freezer Friendly
Wrap each brownie individually in parchment paper, then place them in a freezer bag. They’ll keep for up to 3 months. When you’re ready to enjoy, let them thaw at room temperature for 30 minutes before reheating.
Best Reheating Method
To bring a frozen or chilled brownie back to its original gooey glory, wrap it in foil and heat in a preheated 350°F oven for 8–10 minutes. Alternatively, microwave on medium power for 15–20 seconds. Add a tiny splash of water before reheating to create steam, which helps restore moisture and prevents the brownies from becoming dry.