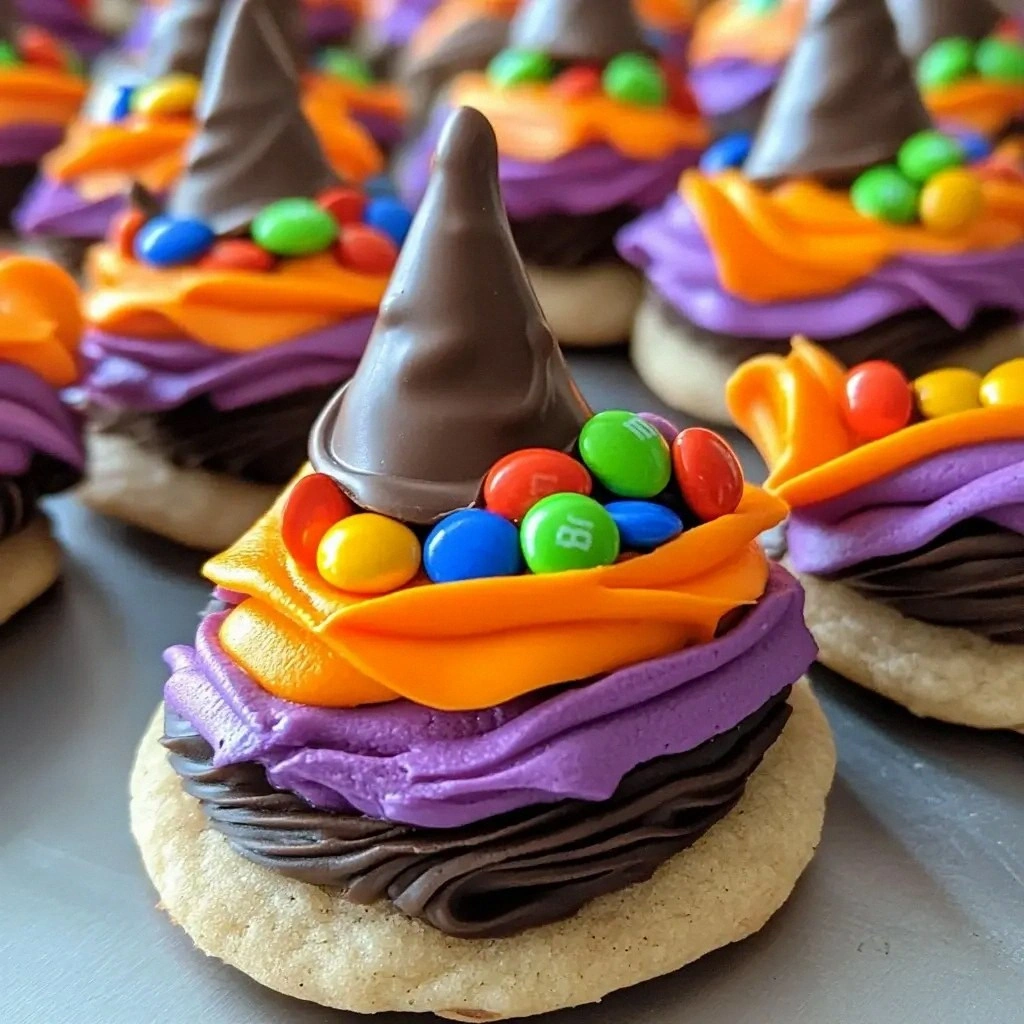
⚡ Why This No-Bake Witch Hat Cookies: Easy Halloween Treats Works
- One‑Pan Cleanup: All components are assembled on a single sheet, so you spend less time scrubbing and more time enjoying the party.
- 30‑Minute Magic: From start to finish, the process takes under half an hour, perfect for last‑minute Halloween prep.
- Texture Contrast: The crisp cookie base meets the velvety frosting, creating a satisfying bite that keeps guests reaching for more.
- Flavor Balance: A subtle hint of sea salt lifts the chocolate, while orange zest adds a whisper of citrus that brightens the palate.
- Customizable Colors: Food‑grade dyes let you switch from classic orange to eerie green or spooky purple in seconds.
- Kid‑Friendly Assembly: Little hands can press the pretzel “brim” and place candy eyes, making it a fun activity for the whole family.
- Sturdy Structure: The double‑coating technique prevents sogginess, ensuring each hat holds its shape for hours on a party table.
- Seasonal Flair: The recipe’s pumpkin‑spice dust and orange tint capture the essence of Halloween without being overpowering.
🍋 The Ingredients: Quality Matters
The Fresh Stuff
Freshly baked chocolate sandwich cookies form the backbone of each witch hat. Opt for a brand that uses real cocoa butter rather than vegetable oil; the richer fat content gives a buttery snap that won’t crumble under the weight of the frosting. If you can’t find chocolate sandwich cookies, you can craft your own by layering a thin sheet of dark chocolate between two crisp chocolate wafers, sealing the edges with a dab of melted chocolate. For a seasonal twist, sprinkle a pinch of pumpkin‑spice dust onto the cookie surface before assembling – the warm spice will meld beautifully with the chocolate’s depth.
Pantry Staples
The frosting is a simple blend of cream cheese, butter, powdered sugar, and a splash of vanilla extract, but the magic lies in the addition of a tablespoon of orange zest and a pinch of sea salt. The zest injects a bright citrus note that cuts through the richness, while the salt amplifies the chocolate flavor, preventing it from becoming cloyingly sweet. Use unsalted butter to control the salt level precisely; too much salt can dominate the delicate balance. If you prefer a dairy‑free version, substitute the cream cheese with a plant‑based cream cheese and the butter with coconut oil – the texture remains luxuriously smooth.
Chocolate Coating Essentials
Two types of chocolate are essential: white chocolate for the inner seal and milk chocolate for the outer hat shell. The white chocolate acts as a moisture barrier, ensuring the frosting doesn’t seep into the cookie, while the milk chocolate provides the classic dark hue that screams “witchy.” Choose high‑quality couverture chocolate with at least 30% cocoa butter for a glossy finish that hardens quickly. If you’re short on time, microwave the chocolate in 20‑second bursts, stirring in between to avoid scorching; a smooth, glossy melt is the goal.
Finishing Touches
Mini pretzel sticks become the hat’s brim, offering a salty crunch that contrasts the sweet frosting. Candy eyes, preferably black licorice or sugar pearls, give each hat its spooky stare. A dash of orange and black food coloring allows you to tint the frosting and chocolate to match your Halloween palette. For added drama, sprinkle a pinch of edible glitter on the brim just before the chocolate sets; the sparkle catches the light like a moonlit night.
🔥 Step-by-Step Instructions
-
Begin by laying out 20 chocolate sandwich cookies on a clean work surface, spacing them evenly. Pat each cookie gently with a paper towel to remove any excess moisture; this ensures the frosting adheres without sliding. Place a small dollop (about a teaspoon) of cream‑cheese frosting in the center of each cookie, spreading it to the edges with a butter knife. As you spread, you’ll notice the frosting turning a creamy ivory, ready to become the hat’s base.
🪄 Kitchen Hack: Use a piping bag fitted with a wide tip to apply the frosting quickly and uniformly, saving precious minutes. -
Next, melt the white chocolate in a heat‑proof bowl over a pot of simmering water (double boiler) until it becomes a glossy, fluid sheen. Stir continuously to avoid scorching; the chocolate should be smooth and glossy, not grainy. Dip the frosted side of each cookie into the melted white chocolate, ensuring the entire surface is coated. The white layer will create a protective seal that keeps the frosting from soaking into the cookie.
-
Transfer the white‑coated cookies onto a parchment‑lined baking sheet. Allow them to set at room temperature for 5 minutes, then pop the sheet into the freezer for a solid 10 minutes. The chill firms the white chocolate, creating a sturdy base for the next coating. While waiting, prepare your pretzel sticks by breaking them in half; these will become the brim of each hat.
-
While the white chocolate is chilling, melt the milk chocolate using the same double‑boiler method, adding a few drops of black food coloring if you desire a deeper, midnight hue. Stir until the chocolate is fully fluid and glossy. Once the white layer is firm, dip each cookie again, this time into the milk chocolate, covering the top half and leaving the lower edge free for the pretzel brim.
🪄 Kitchen Hack: To achieve an even coat, gently tap the dipped cookie against the side of the bowl; excess chocolate will drip off, leaving a smooth finish. -
Immediately after the chocolate coating, press two pretzel halves onto the lower edge of each hat, forming the brim. The pretzel should sit snugly against the chocolate, creating a crunchy border that contrasts the silky chocolate shell. Press lightly to ensure adhesion, but avoid crushing the pretzel. This step is crucial because the pretzel not only adds texture but also serves as a structural support for the candy eyes.
👀 Watch Out: If the chocolate is too warm when you add the pretzel, it can melt and lose its crispness; ensure the chocolate has thickened slightly but is still pliable. -
While the chocolate is still tacky, place a candy eye on each hat’s front, using the back of a small spoon to press it gently into the frosting. The eyes should sit just above the pretzel brim, giving the illusion that the witch is peering out from beneath her hat. If you prefer a more mischievous look, use two eyes per hat and add a tiny drizzle of black icing for pupils.
-
Return the completed hats to the freezer for a final 15‑minute set. This chilling period locks in the chocolate’s snap and ensures the pretzel brim remains crunchy. As the cookies chill, the aromas of cocoa, butter, and a faint hint of orange will fill your kitchen, creating a sensory preview of the treat you’re about to serve.
🪄 Kitchen Hack: Stack the cookies on a single sheet of parchment and cover with another sheet before freezing to prevent them from sticking together. -
After chilling, arrange the witch hats on a festive platter. If you’d like extra sparkle, dust the brim with a pinch of edible glitter or a light sprinkling of powdered sugar tinted with orange food coloring. Serve them at room temperature for the perfect balance between firm chocolate and melt‑in‑your‑mouth frosting. Trust me, the moment guests see the glittering brims, they’ll be enchanted and reach for another.
🏆 Chef's Tips for Success
Control the Chocolate Temperature
Chocolate is fickle; too hot and it seizes, too cold and it becomes grainy. Use a digital thermometer and aim for 115°F (46°C) for melting white chocolate and 120°F (49°C) for milk chocolate. Once melted, remove the bowl from heat and let it cool to around 90°F (32°C) before dipping. This temperature window ensures a glossy finish that sets quickly without streaks.
Even Frosting Distribution
When spreading the cream‑cheese frosting, work quickly but gently. Over‑mixing introduces air bubbles that can cause the frosting to crack once chilled. A spatula with a flexible edge glides smoothly over the cookie surface, creating an even layer that won’t ooze out during the chocolate dip.
Pretzel Brim Placement
Press the pretzel sticks just enough to embed them in the chocolate, but not so hard that they break. If you find the pretzel slipping, lightly dust the chocolate surface with a tiny amount of cocoa powder; this adds friction and keeps the pretzel in place while the chocolate sets.
Timing Is Everything
Work in batches of five to ten hats to keep the chocolate at the right consistency. If the chocolate begins to thicken, gently re‑warm it in short bursts, stirring constantly. This prevents a thick skin from forming, which would otherwise lead to uneven coating.
Presentation Perfection
For a dramatic presentation, line a serving tray with orange‑colored parchment paper and sprinkle a few candy corn “spells” around the hats. A few sprigs of fresh rosemary can add a rustic, witch‑like vibe. The visual contrast of the dark hats against the orange backdrop makes the treats instantly Instagram‑worthy.
🎨 Variations to Try
Spicy Sorcerer
Add a pinch of cayenne pepper to the frosting for a subtle heat that awakens the palate. Top each hat with a tiny drizzle of dark chocolate infused with chili oil for a daring, fiery finish.
Caramel Cauldron
Swirl a tablespoon of caramel sauce into the cream‑cheese frosting before spreading. The caramel ribbons create a marbled effect that looks like bubbling potion inside the hat.
Minty Midnight
Replace orange zest with a few drops of peppermint extract and add green food coloring to the frosting. Garnish with crushed peppermint candies for a refreshing twist that still feels Halloween‑appropriate.
Vegan Witchcraft
Swap cream cheese for a vegan alternative made from cashews, and use coconut oil instead of butter. Choose dairy‑free dark chocolate and vegan pretzel sticks to keep the entire treat plant‑based without sacrificing texture.
Gluten‑Free Goblin
Use gluten‑free chocolate sandwich cookies or make your own using almond flour wafers. Ensure the pretzel sticks are certified gluten‑free, and the result is a safe, spooky snack for guests with dietary restrictions.
❄️ Storage & Reheating
Fridge
Store the completed witch hats in an airtight container lined with parchment paper. They will stay fresh for up to 3 days, retaining their crisp chocolate shell and creamy frosting. If you notice any condensation, simply pat the tops with a paper towel before serving.
Freezer
For longer keeping, place the hats on a baking sheet and freeze individually for 1 hour, then transfer to a zip‑top freezer bag. They can be frozen for up to 2 weeks. Thaw at room temperature for 15 minutes before serving; the chocolate will regain its snap while the frosting remains smooth.
Reheating
If you prefer a softer bite, microwave a single hat for 5‑7 seconds on low power. This gently warms the frosting without melting the chocolate shell, giving a melt‑in‑the‑mouth sensation that’s perfect for a chilly autumn evening.