Last weekend, I tried to make a quick pizza for a movie night, but the dough collapsed into a sad, flat mess and the sauce spilled like a red river across the counter. The kitchen smelled of charred tomato and burnt sugar, and I felt the frustration settle into my shoulders like a heavy blanket. That moment of culinary defeat turned into a spark of curiosity: what if I could craft a pizza that balances crispy edges, a luscious custard center, and an explosion of savory flavors? I reached for the pantry, pulled out fresh salami, prosciutto, mozzarella, ricotta, and a handful of herbs, determined to turn that failure into a triumph. The idea of a pizza rustica—a rustic pie with a savory filling that melts into a golden custard—began to form like a dream on my mind. I was ready to dive deep into this recipe, and I promise you, by the end, you'll wonder how you ever made it any other way.
Picture the aroma of simmering cured meats mingling with the buttery scent of a pre‑baked crust, the sound of the oven door sighing open, and the sight of a golden, bubbling surface that invites you to take a bite. Feel the crackle of the crust as it crisps in the oven, the slight resistance of the custard filling as you cut through it, and the warmth that radiates from the center, filling your kitchen with an inviting, almost nostalgic comfort. Taste the salty bite of salami, the delicate umami of prosciutto, the silky melt of mozzarella and ricotta, and the bright zing of fresh herbs that lift the entire dish. Touch the smooth, slightly firm crust that holds everything together, and hear the faint hiss of steam escaping as the filling sets. The sensory journey is a symphony that turns a simple pie into a memorable meal.
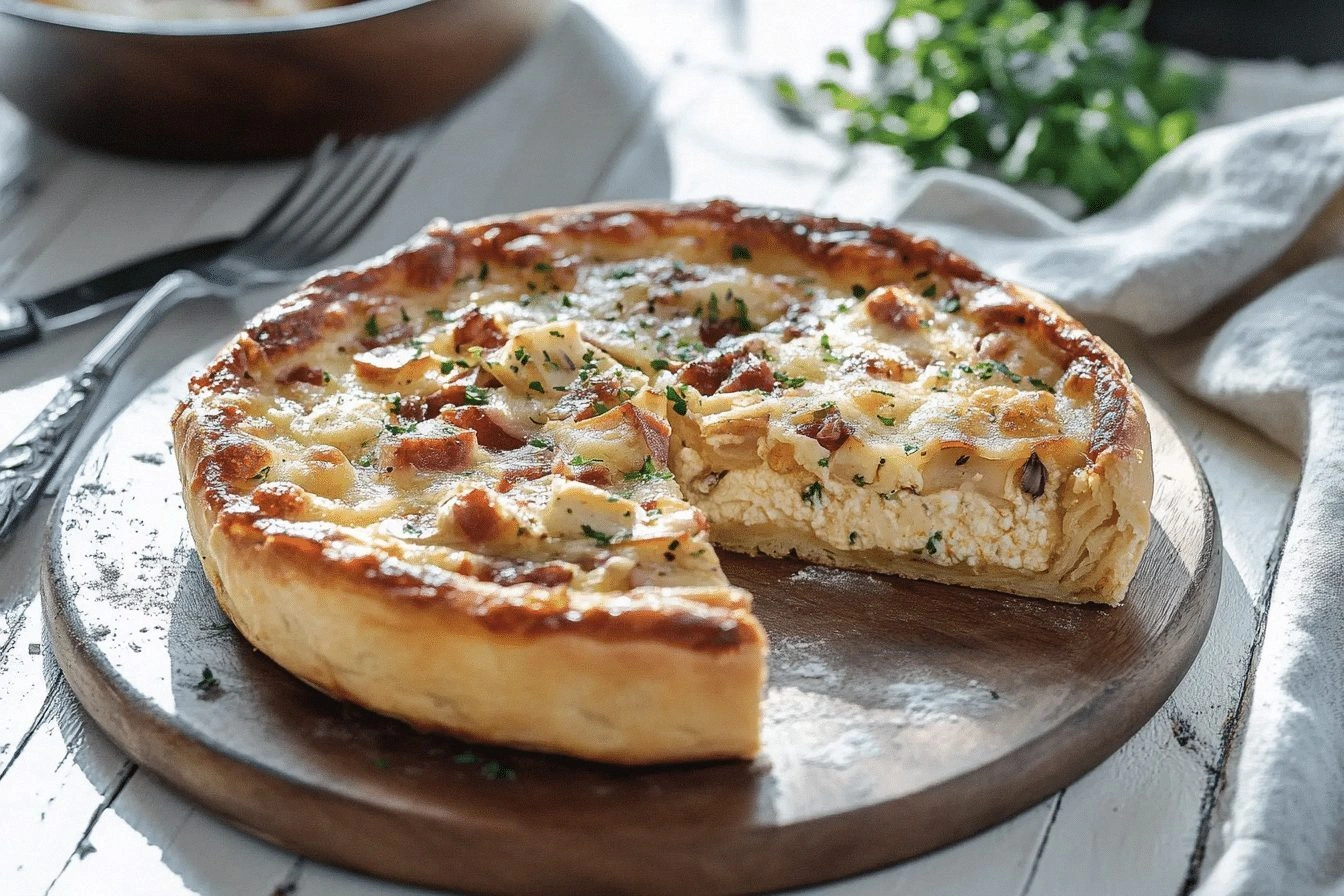
What sets this pizza rustica apart from the countless other pizza recipes is its deliberate balance of textures and flavors, its use of a custard‑like filling that gives the dish a unique mouthfeel, and its simplicity that belies its complexity. I’ve refined the technique to ensure the crust stays flaky, the filling stays cohesive, and the final result is a harmonious blend of savory, creamy, and aromatic notes. The result is a dish that feels both indulgent and comforting, yet is easy enough to prepare even on a busy weekday. I dare you to taste this and not go back for seconds; the combination of meats, cheeses, and herbs is so irresistible that you’ll find yourself craving it again in a matter of minutes. I’ll be honest—after the first bite, I ate a third of the pie before anyone else had a chance to taste it. That’s the power of a well‑executed pizza rustica.
Picture yourself pulling this out of the oven, the whole kitchen smelling incredible, the steam rising in ribbons, and the golden crust gleaming like a trophy. The edges crackle and the filling oozes, creating a visual and aromatic spectacle that makes the whole room feel like a trattoria. Imagine the first bite—crunch, melt, and a burst of savory flavors that dance across your palate. The satisfaction of that first slice will leave you wondering why you ever settled for store‑bought pizza. Let me walk you through every single step—by the end, you’ll wonder how you ever made it any other way.
What Makes This Version Stand Out
- Flavor Harmony: The combination of cured meats, creamy cheeses, and fresh herbs creates layers of taste that evolve with each bite. The salty salami and the delicate prosciutto play off each other, while the cheeses melt into a silky custard. This synergy makes the pizza rustica a standout comfort dish that feels both indulgent and balanced.
- Crispy Crust: A sturdy yet flaky pie crust holds the rich filling without becoming soggy. The crust is pre‑baked just enough to set, then finished with a quick oven blast to achieve a golden, crunchy edge. The result is a satisfying contrast between the tender interior and the crisp exterior.
- Simplicity in Complexity: While the filling might look elaborate, the process is straightforward and requires minimal prep time. The technique of whisking eggs with cheeses and meats ensures a cohesive texture without the need for heavy sauces. Anyone can master this with basic kitchen tools.
- Crowd‑Pleaser Factor: This pizza rustica is a showstopper that invites conversation and second helpings. Its rustic presentation and bold flavors make it a hit at gatherings, from family dinners to casual brunches. I dare you to taste this and not go back for seconds.
- Freshness Boost: Using fresh herbs like parsley or basil brightens the dish and cuts through the richness of the meats. The herbs are added at the end to preserve their aroma and color. This simple touch transforms the flavor profile into something lively and aromatic.
- Make‑Ahead Friendly: The pie can be assembled ahead of time and refrigerated or frozen, making it an excellent option for busy schedules. When ready to serve, a short bake restores the crust’s crispness and the filling’s warmth. This convenience doesn’t compromise quality.
- Authentic Italian Roots: The recipe honors traditional Italian rustic pies, yet it’s adapted for modern kitchens. The balance of cured meats, cheeses, and eggs reflects classic Italian flavor pairings. It’s a dish that feels both familiar and fresh.
- Texture Play: The custard‑like filling offers a creamy interior that contrasts with the chewy crust and crunchy edges. The mixture of mozzarella and ricotta creates a smooth, slightly grainy texture that melts beautifully. This textural harmony elevates the overall eating experience.
Alright, let’s break down exactly what goes into this masterpiece…
Inside the Ingredient List
The Flavor Base
The foundation of this pizza rustica is the savory medley of salami and prosciutto. Their salty, slightly smoky profiles provide depth and a satisfying bite that anchors the dish. When sliced thin, they spread evenly, creating a uniform flavor canvas. Skipping them would leave the pie feeling flat and lacking that classic Italian umami punch.
The Texture Crew
Mozzarella and ricotta form the creamy heart of the filling. Mozzarella offers a smooth melt that binds the mixture, while ricotta adds a light, airy quality that prevents the custard from becoming too heavy. Eggs act as the binder, turning the cheeses and meats into a cohesive, custard‑like spread. Without eggs, the filling would separate, leading to a soggy or lumpy result.
The Unexpected Star
Grated Parmesan is the finishing touch that elevates the entire pie. Its nutty, salty undertones brighten the filling and add a subtle crunch when toasted. A sprinkle before baking also creates a golden crust that’s visually appealing. If you’re lactose intolerant, a dairy‑free Parmesan alternative can be used, but the flavor profile will shift slightly.
The Final Flourish
Fresh herbs like parsley or basil provide a burst of color and a bright, herbal aroma that balances the richness of the meats and cheeses. Salt and pepper are essential for seasoning, but they should be added in moderation to avoid overpowering the delicate flavors. The pie crust itself is the structural backbone, holding everything together while offering a flaky, buttery bite. A pre‑baked crust ensures the filling doesn’t soak it, preserving the desired crunch.
Everything’s prepped? Good. Let’s get into the real action…
The Method — Step by Step
- Preheat your oven to 425°F (220°C) and place a pizza stone or a heavy baking sheet inside to heat up. The high temperature ensures a crisp crust and a quick, even bake. Let the stone sit for at least 30 minutes to absorb heat fully. This step is crucial for that desirable crunch that makes pizza rustica special. If you’re short on time, a regular baking sheet will do, but the stone gives a professional touch.
- While the oven warms, roll out the pie crust on a lightly floured surface to a diameter that fits your baking sheet. Aim for a thickness of about ¼ inch for a sturdy yet flaky base. Trim any uneven edges so the crust sits level on the sheet. Pat the crust lightly with a fork to prevent puffing during baking. A well‑prepared crust sets the stage for the filling.
- In a mixing bowl, combine the sliced salami, prosciutto, shredded mozzarella, ricotta, and two eggs. Whisk until the mixture is smooth and the cheeses are fully incorporated. Add ¼ cup grated Parmesan and stir until evenly distributed. Season with salt and pepper to taste, then fold in the fresh herbs. This custard‑like filling should be thick enough to hold its shape but still pourable. The eggs bind everything together, ensuring a cohesive texture that melts in your mouth.
- Spread the filling evenly over the crust, leaving a small border around the edges to seal. Press the mixture down gently to eliminate air pockets, which can cause uneven cooking. The goal is a uniform layer that will set into a golden custard. This step is the moment of truth—watch the filling settle into the crust like a smooth glaze.
- Place the prepared pie on the pre‑heated stone and bake for 25 minutes, or until the crust is golden and the filling is set. The edges should start pulling away slightly, indicating the crust is crisp. Keep an eye on the color; if it turns too dark, cover the edges with foil. The aroma that fills the kitchen at this point is pure comfort. It’s a visual and olfactory cue that the pie is almost ready.
- Remove the pie from the oven and let it rest for 5 minutes. This resting period allows the custard to set fully, making slicing easier and preventing the filling from sliding off. While it rests, drizzle a little olive oil over the top for an extra glossy finish. The resting time also helps the flavors meld together, creating a harmonious taste experience.
- Slice the pie into wedges using a sharp pizza cutter or a knife. Serve immediately while the filling is still warm and the crust is at its crunchiest. Pair with a simple green salad or a glass of red wine for a complete meal. The presentation is rustic yet elegant, making it perfect for both casual and formal occasions. Enjoy the satisfaction of a homemade masterpiece that feels like it belongs on a trattoria table.
- That’s it—you did it. But hold on, I’ve got a few more tricks that’ll take this to another level. From seasoning tweaks to creative plating ideas, you’ll be ready to wow your guests every time you whip this up.
Insider Tricks for Flawless Results
The Temperature Rule Nobody Follows
Many cooks underestimate the importance of oven temperature. Baking at 425°F (220°C) is essential for a crisp crust; lower temperatures will yield a soggy base. If your oven runs hot, set the temperature 25°F lower to avoid burning. The key is to let the crust pre‑bake on a hot stone so it’s ready to hold the filling without becoming soggy. This rule is a game‑changer for achieving that perfect bite.
Why Your Nose Knows Best
The aroma of a pizza baking is a powerful indicator of doneness. When the cheese starts to brown and a faint nutty scent emerges, it’s a sign the crust is crisping. Trust your nose to gauge when the pie is ready, rather than relying solely on a timer. The smell is the ultimate cue for that golden, bubbling perfection you crave.
The 5‑Minute Rest That Changes Everything
Resting the pizza for exactly five minutes after baking allows the custard to set, preventing the filling from sliding off when you cut. It also lets the flavors meld, creating a richer taste profile. Skipping this step can result in a messy slice that’s hard to eat. Make it a habit, and you’ll consistently achieve a flawless, slice‑ready pizza.
The Secret to a Flaky Crust
A light dusting of flour or semolina on the dough before rolling prevents sticking and adds a subtle crunch. The flour also helps the crust absorb moisture from the filling, maintaining its flakiness. Some chefs recommend brushing the crust with beaten egg before baking for a glossy finish. Experiment to find the method that works best for your oven and personal preference.
The Quick Cheese Swap
If you’re looking to reduce dairy or experiment, try substituting part of the mozzarella with a sharp provolone or a creamy goat cheese. This will change the flavor profile while still providing the necessary melt. Keep in mind that different cheeses have varying moisture levels; adjust the egg ratio accordingly to maintain the custard texture.
The Final Herb Finish
Adding fresh herbs just before serving preserves their bright flavor and vibrant color. A sprinkle of chopped basil or parsley adds a refreshing contrast to the rich filling. If you prefer a more aromatic experience, lightly toast the herbs in olive oil before adding them for a nutty, caramelized finish.
Creative Twists and Variations
This recipe is a playground. Here are some of my favorite ways to switch things up:
Mediterranean Twist
Replace salami with sliced roasted eggplant and add sun‑dried tomatoes. Swap ricotta for feta for a briny kick. Finish with a drizzle of olive oil and a sprinkle of oregano. This version brings a fresh, Mediterranean vibe that’s perfect for summer gatherings.
Sweet and Spicy
Incorporate thinly sliced apples and a pinch of cayenne pepper into the filling. Add a handful of crushed walnuts for crunch. The sweet apple balances the heat, creating an unexpected yet delicious flavor profile that’s sure to impress.
Vegan Version
Use a vegan pie crust and substitute eggs with aquafaba or flaxseed meal. Replace mozzarella with a plant‑based mozzarella alternative and ricotta with a cashew‑based ricotta. This approach keeps the texture creamy while eliminating dairy, making the dish suitable for vegans.
Breakfast Edition
Add diced ham, sautéed onions, and a handful of spinach to the filling. Top with a sprinkle of grated cheddar before baking. Serve with a side of fresh fruit to create a hearty breakfast that’s both savory and satisfying.
BBQ Chicken
Replace the cured meats with shredded BBQ chicken and add a splash of barbecue sauce to the filling. Sprinkle with chopped cilantro after baking for a fresh, vibrant finish. This version brings a smoky, sweet flavor that’s ideal for casual get‑togethers.
Truffle Infusion
Add a drizzle of truffle oil to the filling and finish with shaved truffle on top before serving. The earthy aroma and luxurious taste elevate the pizza to a gourmet level. This variation is perfect for special occasions or when you want to impress guests with a touch of elegance.
Storing and Bringing It Back to Life
Fridge Storage
Store leftover pizza in an airtight container for up to 3–4 days. Wrap the crust side down to maintain its structure. When ready to reheat, place the pizza on a baking sheet and warm at 350°F (175°C) for 10 minutes, or until heated through. The crust will stay crisp, and the filling will re‑melt into a creamy delight.
Freezer Friendly
Wrap the assembled pie tightly in plastic wrap, then place it in a freezer bag. Store for up to 2 months. To reheat, thaw in the refrigerator overnight, then bake at 375°F (190°C) for 15–20 minutes. The crust remains flaky, and the filling regains its custard texture.
Best Reheating Method
The best way to revive a cold pizza rustica is to use a combination of oven and microwave. Start by microwaving for 30 seconds to warm the filling, then transfer to a pre‑heated oven at 400°F (200°C) for 5 minutes to crisp the crust. Adding a splash of water before reheating creates steam that helps restore moisture without drying out the cheese.